
Hey Friend,
I’m going to tell you all about my thread painting with the Glide Foot. Are you ready?
I know you’ve been dying to hear what adventures, My Moxie and me have been embarking on in the new year. Here’s your update on what Mimi and I have been doing. Yes! You heard that right. My Moxie got herself a new name. She didn’t like that I kept calling her “my” and that she didn’t have her “own” name. So, I named her Mimi. She doesn’t know that Mimi is short for My Moxie – Letter M and Letter M. And we’re going to keep that just between the two of us. Okay. She’s never going to know. 🙂
So, what have we been up to? Thread painting with the glide foot.

The other day, I tried thread painting on Mimi, my style, and it didn’t turn out that great. Don’t get me wrong. It was a good start. But far from perfect. (Check it out here) My style of thread painting is quite different. So, I wanted to challenge myself to give it another try. You know what, I haven’t found anything like a self-challenge that can get you to do things you thought you couldn’t do and build skills so fast you won’t believe your eyes.

For this challenge, I turned to one of the older pieces I did in my first ever challenge Stitch the Sketch Episode 6. Just like the previous time I tried Thread painting on Mimi, I wanted to see how I’ll do recreating this Table Top Medley. Of course the difference between this new thread painting challenge and the one I did a few years back in Episode 6 is that I’m using a longarm machine which doesn’t quite lend itself to thread painting that well. So that’s where the challenge is.

To start, I did a rough sketch directly on the fabric. I wasn’t planning on using the finished piece so I didn’t worry that much about the pencil marks. However, if you’re doing something for keeps, you can check out this post about alternate tracing methods.

Initially, I forgot that I’d just received a new foot from Handi Quilter. Oh man, the Glide foot 2! Let me tell you. The glide foot is just what it name says. First, changing feet on the Handi Quilter Moxie is a breeze (watch this Youtube video and see me do it). Then, when I started thread painting with the glide foot, what a difference in visibility that clear plastic made. I tell you; using the right tools is everything.

Thread painting with the Glide foot is certainly an improvement on using the standard foot that the Moxie comes with. The Glide foot is a transparent plastic bowl-shaped foot. It helps you see where you’re going much better. Also, with all the thread that I was building up on the surface of my fabric, the foot was just gliding over that thickness without a problem. My first time thread painting with the glide foot and I’m sold.

You can see the results for yourself. This is much better than my last attempt at thread painting on Mimi. I still struggle with controlling curvy shapes. I had gotten that aspect of thread painting down to a science on my domestic machine. However, here, my hands are still wobbly. I can easily doodle circles. but tracing a circle with the long arm machine or drawing a very clean circular shape is something I’m still learning.

Of course this type of stitching is not for everyone. You might find it simpler to use a domestic machine to do this especially if it’s a small piece. However, you know me and how I take on the most impossible challenges to push myself. So, here are the results of this challenge. In addition to sharing the results with you, I wanted to do something for you that I haven’t done in way too long – I made you a video.
So, I created a Youtube video for you so you can actually see me using my new Moxie machine. I hope you appreciate all the love that went into making it for you just so you can peek into my process. Enjoy.
Friend, here’s the thing. If you’re struggling with a skill, there’s no better way that I know to bring yourself up to speed than to challenge yourself to practice that skill repeatedly for a period of time. You’ll be surprised at the improvements you’ll make. I hope that inspires you.
Thats it for now.
Warmest regards,

PS: If this is your first time reading My Moxie and Me journal, you can catch up on all the previous journal entries here

Hey Creative Friends, in my previous post, I promised to tell you how my initial attempts at beginner longarm quilting went. So here it is.
I got a visit from my local Handi Quilter reps –That’s Sew Debbie – the day after installation. Jessica came over to complete the installation – attach the leaders and then teach me how to get started.

Beginner Longarm Training on the Moxie
First we started with how to wind a bobbin on the standalone bobbin winder. It’s not much different from the way the bobbin winder on my domestic machine works. The only thing is that, it’s stand alone, which means I have to make a separate trip to the bobbin winder each time I run out of bobbin thread.

I don’t quite like that especially since I match my bobbin thread to the top thread. It means every time, I ran out of bobbin thread, I have to take the top thread off to go fill up my bobbin. What I do like about the bobbins though is that they’re Class M bobbins which are larger, so it takes longer to ran out of bobbin thread.

The next step in my beginner longarm training was to learn to thread the machine, get the bobbin in its case, and check the bobbin tension. During this section, I missed my thread cutter and auto threader on my domestic machine. Also, working the bobbin case meant I had to go under the machine. I had visions of spending a lot of time under my longarm machine loading bobbins or troubleshooting problems.

Although there’s no automatic threader on the Moxie, threading it is relatively easy. The needle is shaped in such a way that when you run the thread along the front groove it easily slips into the eye. Even withoutI my eye glasses I easily threaded the needle. So, that’s really awesome.

The next stop on my beginner longarm training was changing the needle and swaping out feet. That was pretty simple. We also went through the on screen menus. That takes a little getting used to. But there aren’t that many options on the menus, so the learning curve is not that steep.

Did someone say loading a quilt on the longarm for the first time?
Then, the next major stop on the beginner longarm training was loading a quilt on the frame. This was the most stressful part of the entire training for me. It’s totally opposite to what I’m used. I’m used to fusing my layers together before I start quilting. Here, I don’t have to hold the layers together before loading them onto the sewing machine. Each layer goes on separately and onto a separate pole.

After I was taught how to do it, I became anxious. I was anxious that when I did it on my own, I’ll make a mistake. I worried that I’ll pin the wrong side of the fabric to the leaders when I’m loading my work onto the machine. That left me feeling out of sorts.

Moving along, when we got through pinning, I finally got to practice on the longarm for the very first time.

Oh, the speed! I love the speed! It’s so fast.
It’s like 10x the feeling you get using a power tool to do something. I remember the first time I used an electric saw to cut wood to make stretcher bars for my work. The speed of that saw pales in comparison to the speed of the Moxie. It can go as fast as 1800 stitches per minute. But no worries. The Handi Quilter Moxie, has speed controls so you can adjust it to you comfort level.

I had to turn down the speed so that I could control it. Otherwise, it was getting away from me. When I slowed down, I felt more comfortable. When I started stitching, the first thing I noticed was that small movements of the handle bars result in big movement on the fabric, I practiced my thread shading method and saw that I could do that well on the longarm. I tried curves and I wasn’t successful in drawing small circles. The more I practiced, the smaller I could make the circles. However, by the end of the first day, I was still struggling to stitch small smooth circles.
All in all, my day ended with mixed emotions. My fears and insecurities about getting a longarm machine came to the fore front. At that point, I was more unsure about my decision to get a long arm than I’d ever been.

Rolled Up My Sleeves and Got to Work
The next day, I couldn’t leave it be. I went into my studio bright and early and decided to do the things which had scared me the previous day during my beginner longarm training.
I unloaded the practice sandwich Jessica had brought me and tried to figure out how to load my own fabrics. Jessica had brought me beautiful batik-like fabrics to practice on. But I couldn’t see how well or badly I was stitching on that fabric. I wanted to be able to see my stitches clearly – good or bad. So, I decided to use solid black fabrics for both the top and bottom. Then, I turned my iPad on, queued the Handi Quilter training video on Youtube and started figuring out how to load a quilt all by myself. By the time I was through loading the quilt top, batting and backing, I felt better about my future abilities to load another quilt on the longarm.

Now, it was time to go to town with the machine.
I played on it for a long while. I experimented with dense straight line stitching, which I love to do on my domestic machine. And I also tried my hands at pebbles again. My circles were getting smaller than the original ones for sure. But they were still no where near how small I can get them on the domestic. I’ve got a long way to go. To play some more, I signed my name several times. My first attempts were ginormous. Subsequent ones were a little better. Additionally, I drew a tea cup. I still need work on my fine detail skills on the longarm.

By the end of the day, I was in a great mood. I’d conquered my first two major hurdles. I recognize that I have a long ways to go to become as good on the longarm as I am on my domestic. However, I’ve got confidence that with time and practice, I’ll improve.

I was in such a good mood that I called my 11-year old son over to come try his hands at driving the longarm. He loved it. I think the longarm is more intuitive for a beginner to draw with than the sit down machine. He drew his name and some geometric shapes without me coaching him. It was a good day.
That’s it for now, friend.
If you’re enjoying these candid, behind the scenes look at my transition to a longarm machine, please let me know in the comments and consider sharing it with a friend.
Warmest Regards,
PS: Find all the other posts in this series here – My Moxie and Me

Hey Creative friend, in my two previous posts, I told you all about why I decided to upgrade my thread painting machine and how I had to re-organize my studio to welcome the new machine. In this post, I’m going to share with you how Installation Day for the new machine went. So, let’s get right to talking about installing the Handi Quilter Moxie. In a later post, I’ll share my first impressions on sewing with a longarm machine with you. Ready?
Let’s do this.
So, as I told you, I left the Handi Quilter Moxie in it’s box untouched. So when the day arrived for the installation team to arrive from my local retail store, I was so looking forward to seeing it unboxed and installed. In order to get to me, Jessica and Gary had to drive an hour. Our appointment was scheduled for late afternoon. I didn’t do much most of the morning, while I was waiting for them. I was so anxious. 🙂
Unboxing The Handi Quilter Moxie
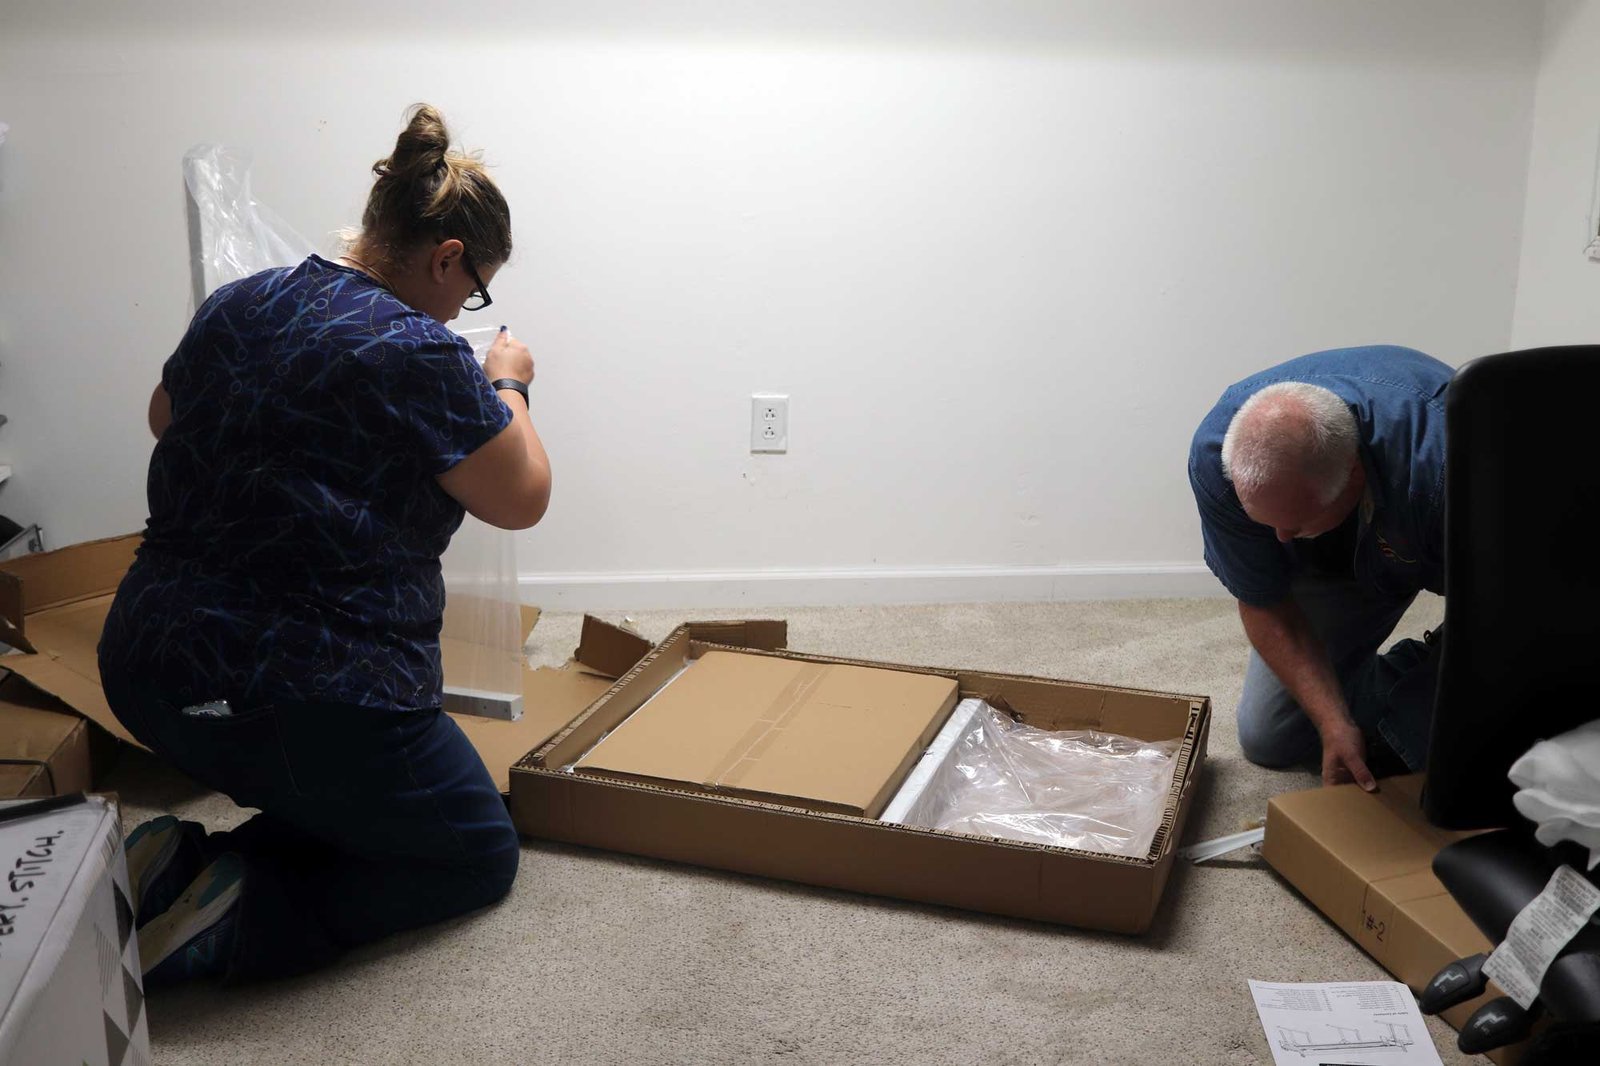
The first order of business was of course to unbox the Moxie. The feeling was like that of a child on Christmas Day waiting to open her gifts. The machine came in three boxes. Two boxes contain the quilting frame and the third box the longarm machine and a starting kit. The frame needed to be installed first since it needed to be in place so that the machine can be placed on top of it.
The folks at Handi Quilter have partnered with the app called BLT. You’ll find it in the App Store on your phone. When you download the app, it gives you step by step instructions on how to install the Handi Quilter Moxie.
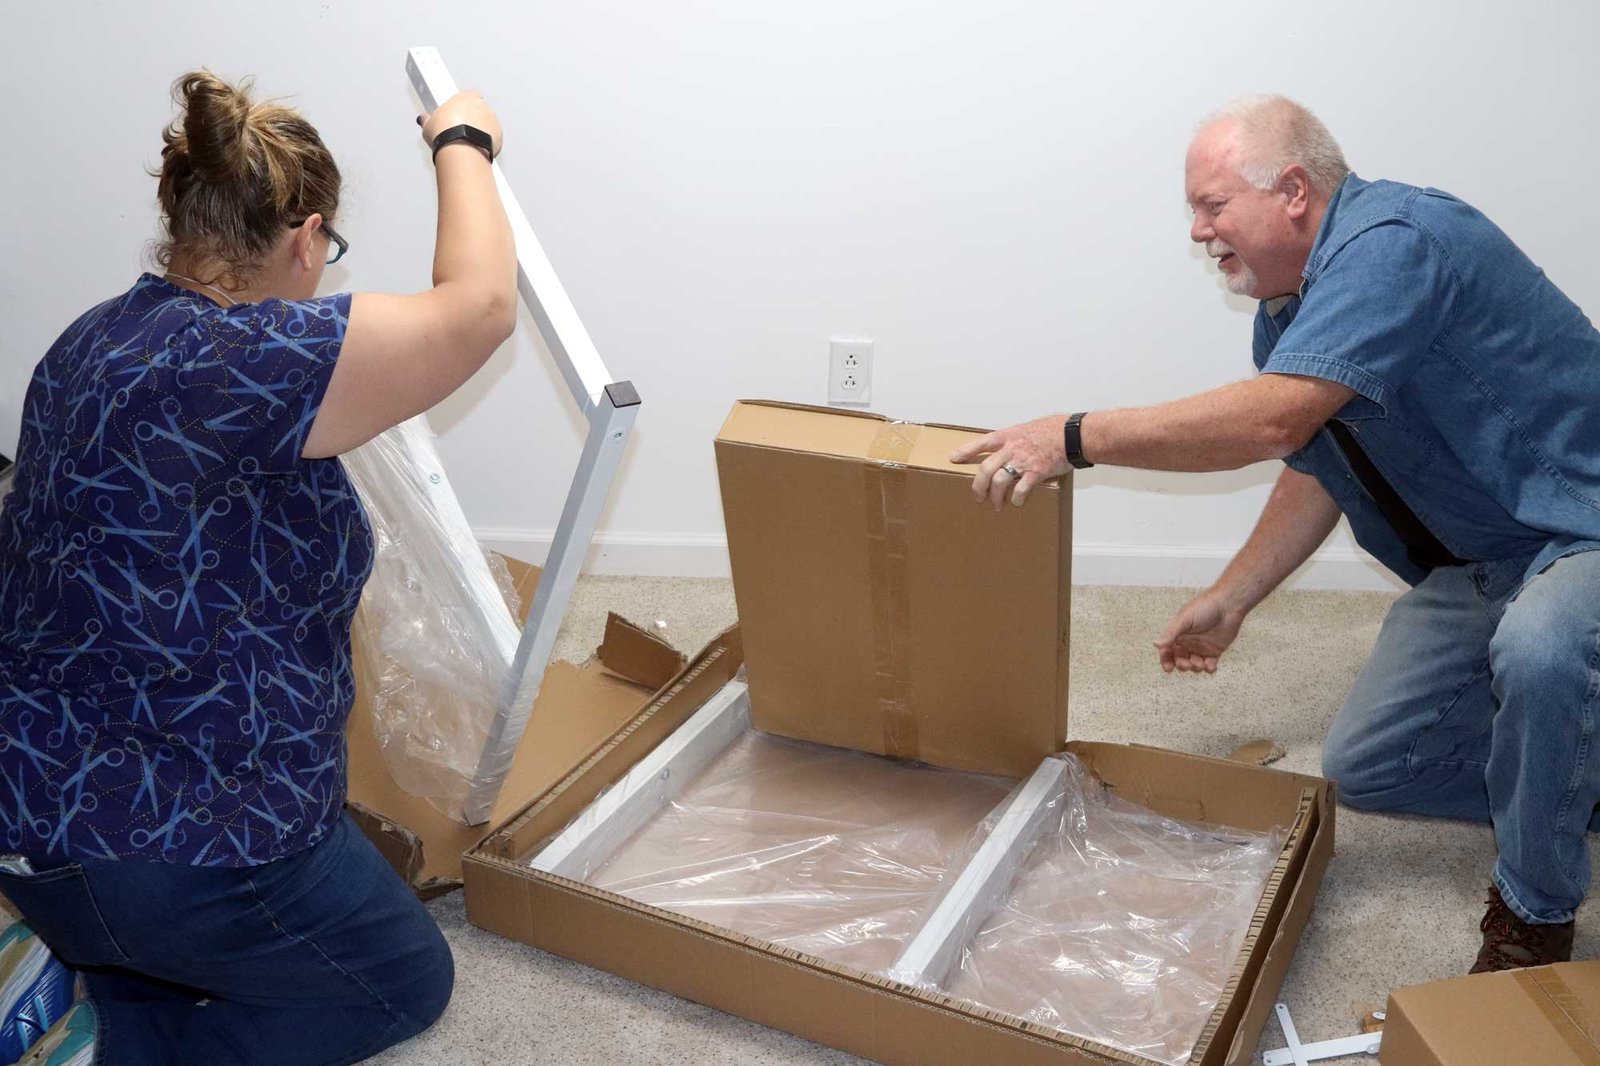
Handi Quilter has different frames. The loft frame is what ships with the Handi Quilter Moxie. It’s light weight and easy to fit into a small space. The Handi Quilter Moxie loft frame is 8 feet in length. There’s an option to extend it to 10 feet if you want. Mine is the standard 8-foot option.
Setting Up the Frame
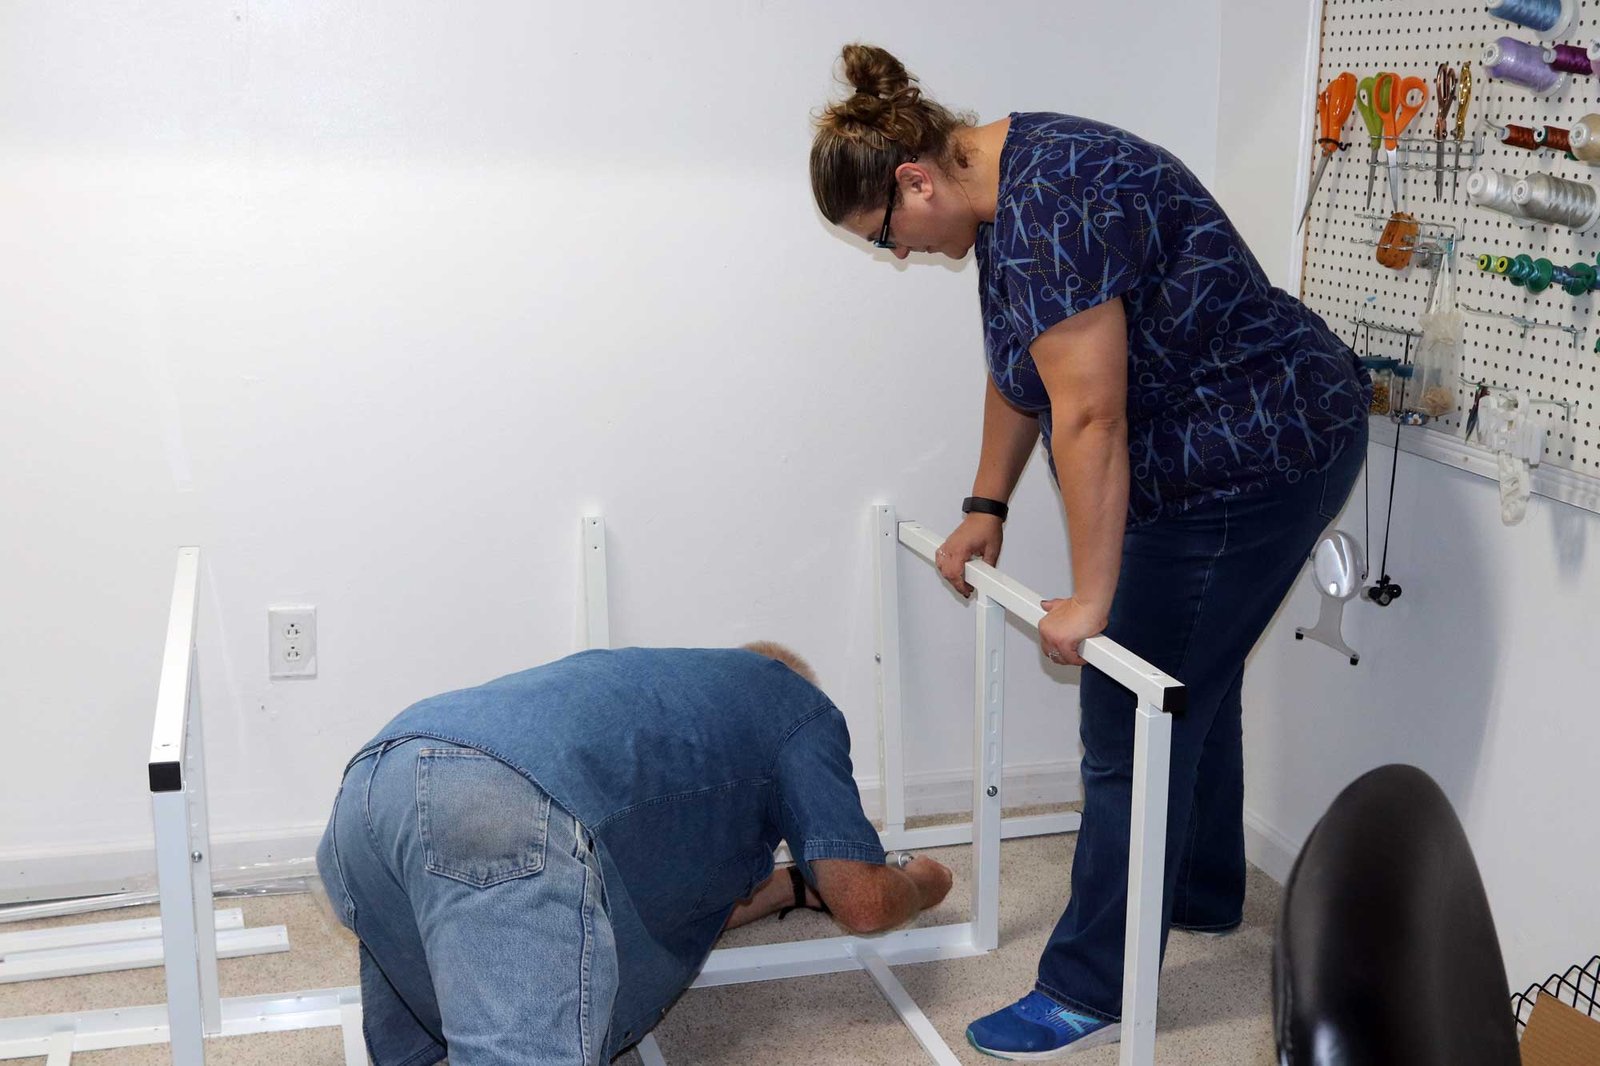
After the frame had been removed from he box, it was installed upside down. There are a ton of screws involved in this installation. We found out that it’s better to dump the screws out of the bags and sort them into the different types in plastic containers for easy access.
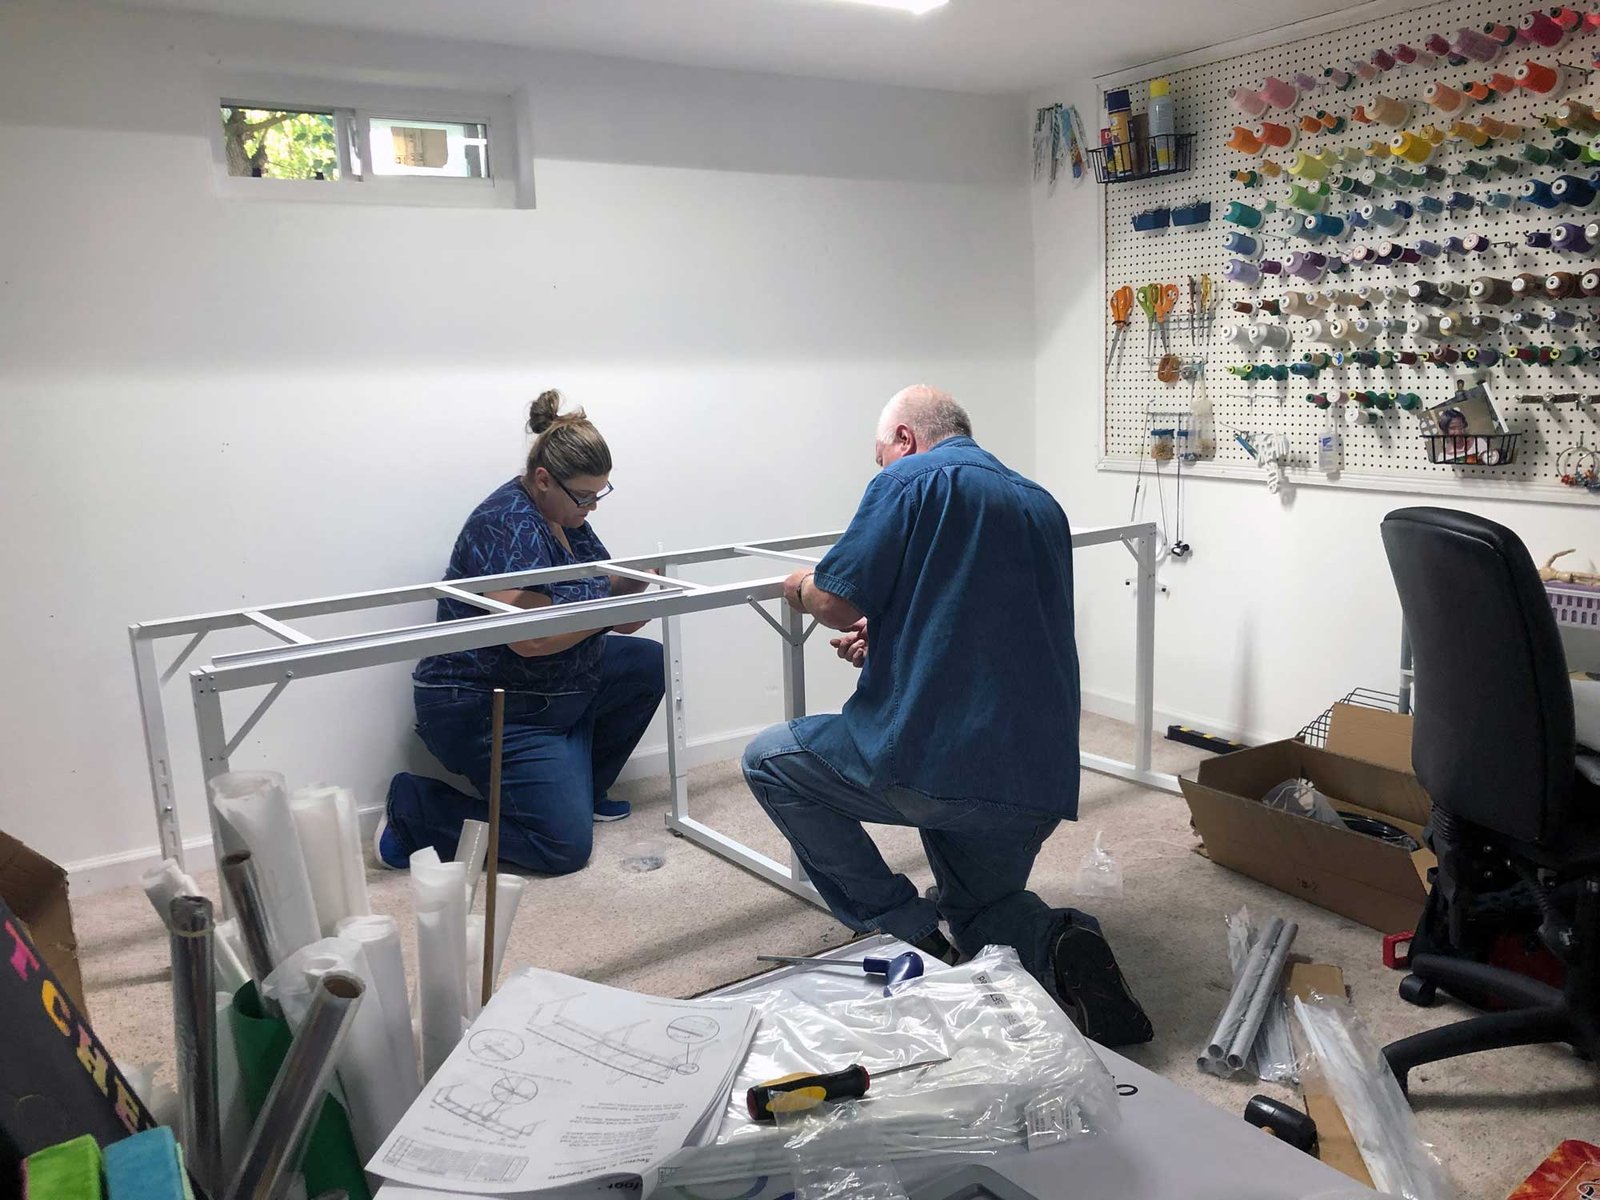
After the legs of the frame were assembled, the next thing was to flip the frame back into the right position.
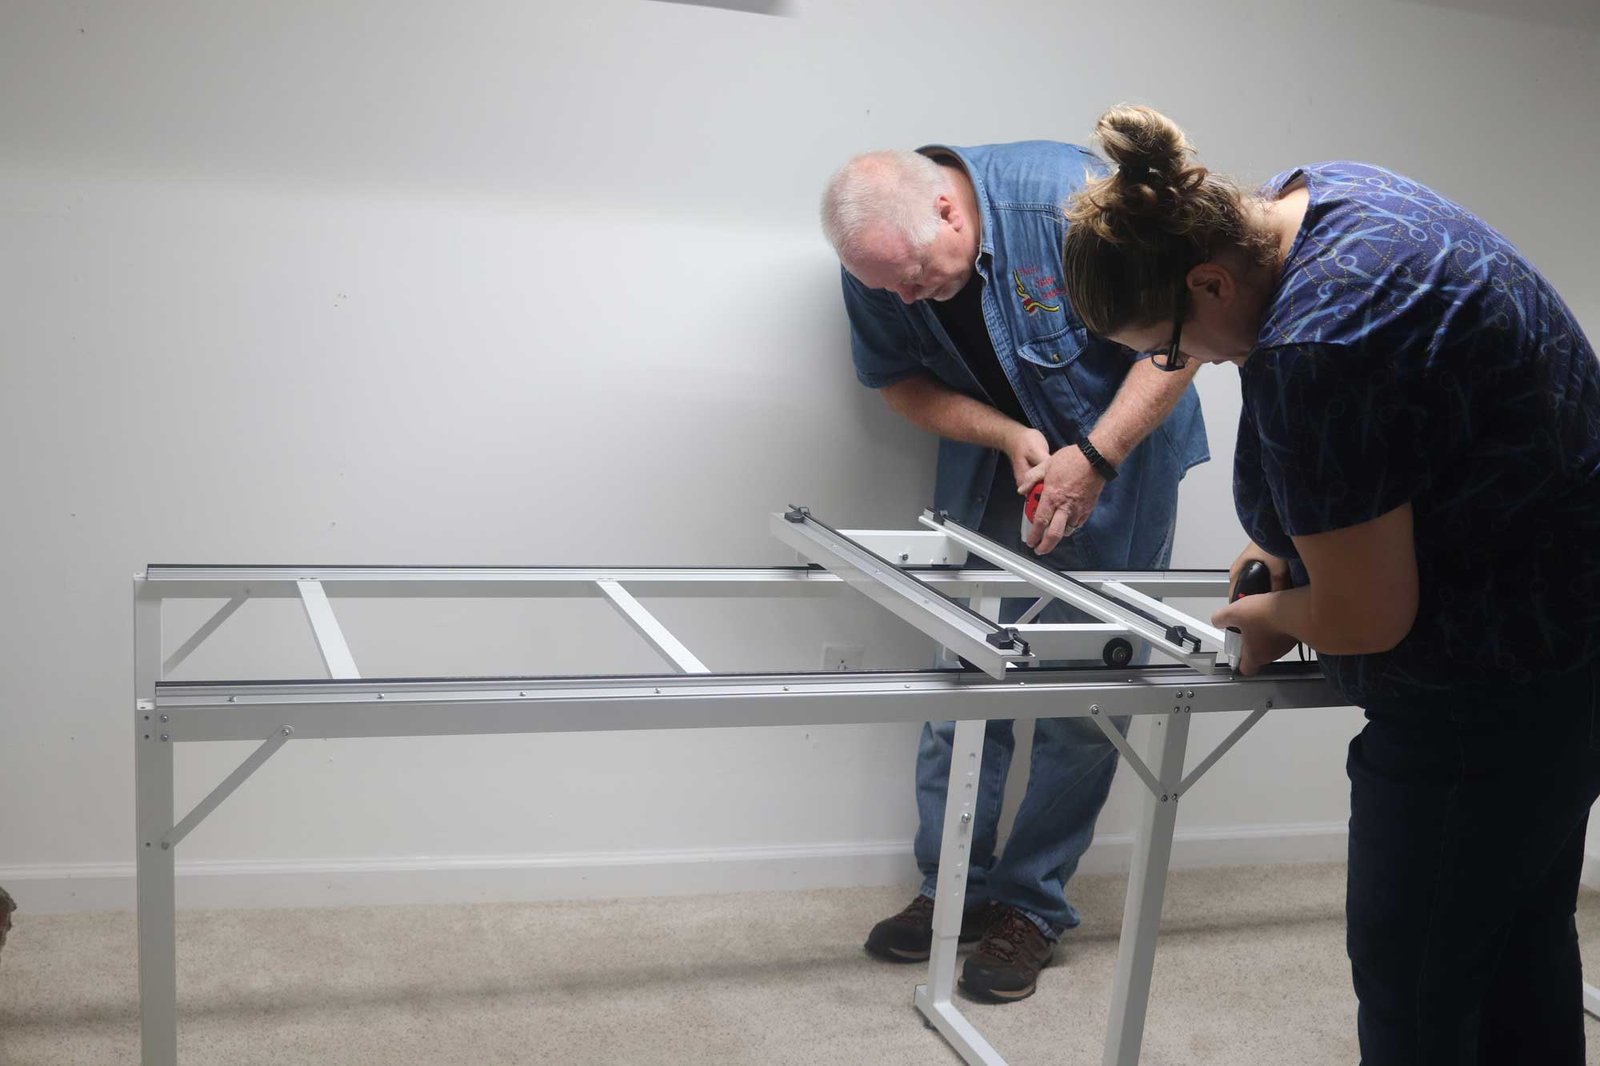
Setting up the Carriage
Then, the carriage was installed on top of it. The carriage is the assembly on which the sewing machine sits. This is what gives the sewing machine the ability to move back and forth on the frame. The frame remains stationery, while the carriage moves.
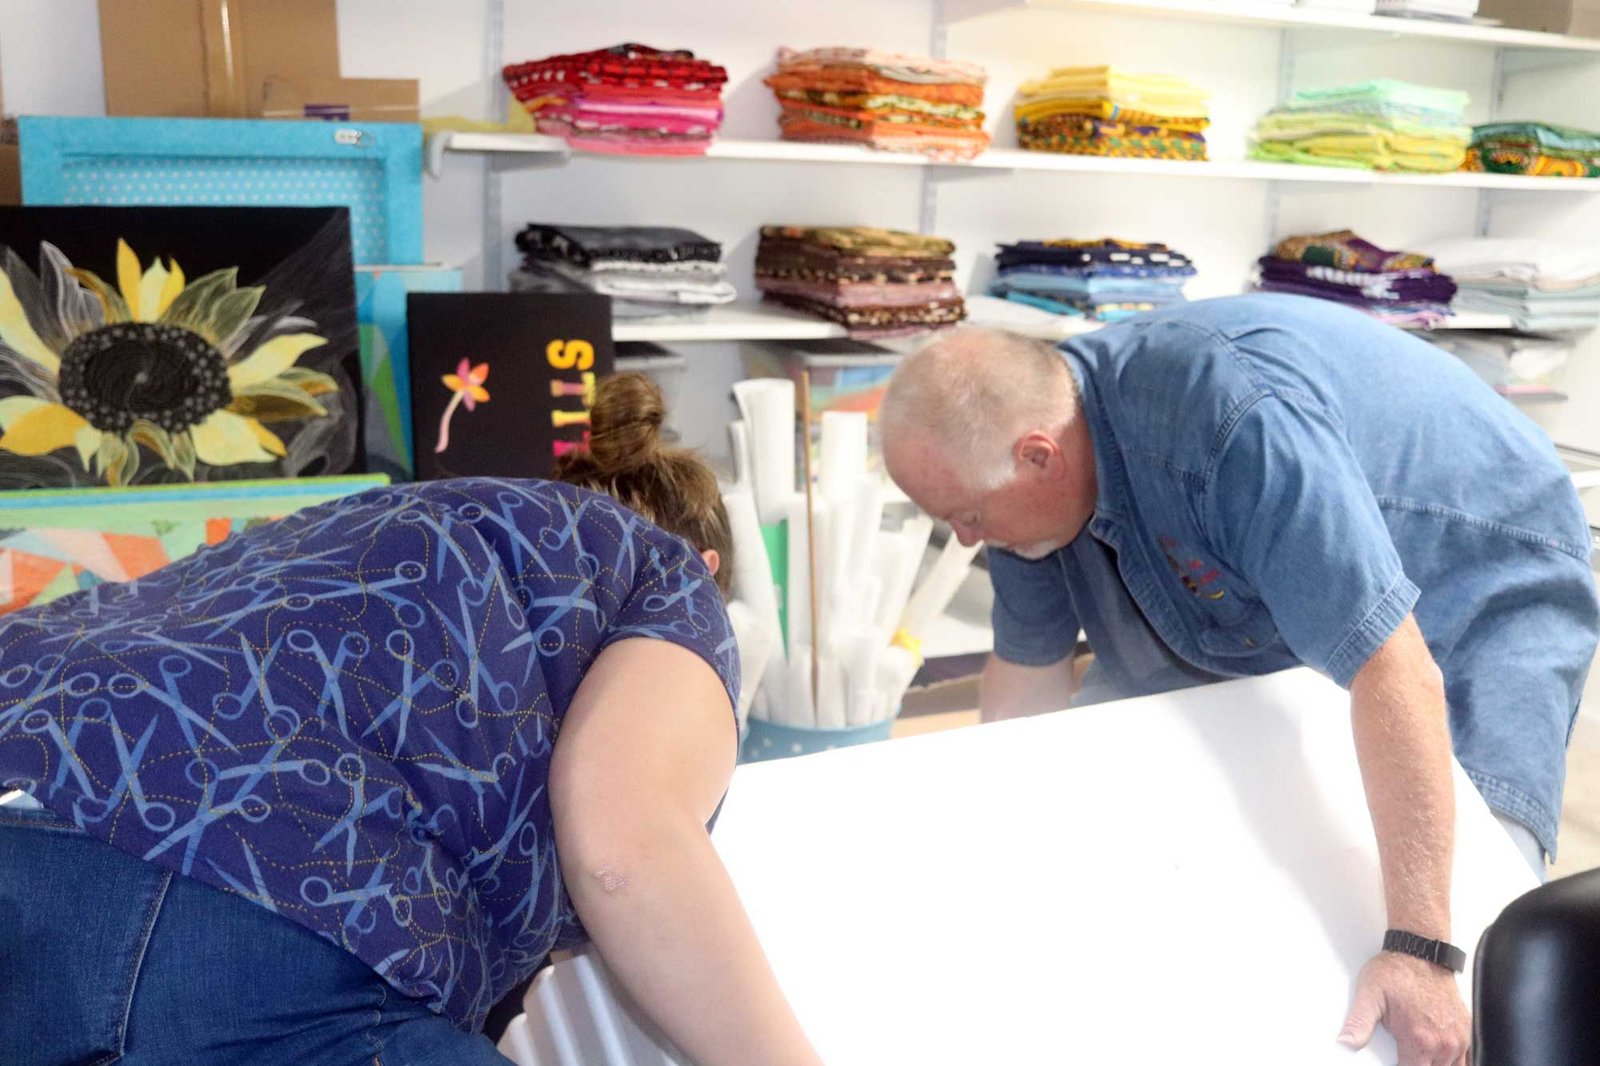
Finally, it was time to unbox the sewing machine itself. While setting up the Loft Frame, there was really no need for the sewing machine. So it stayed in its box patiently or perhaps impatiently waiting its turn.
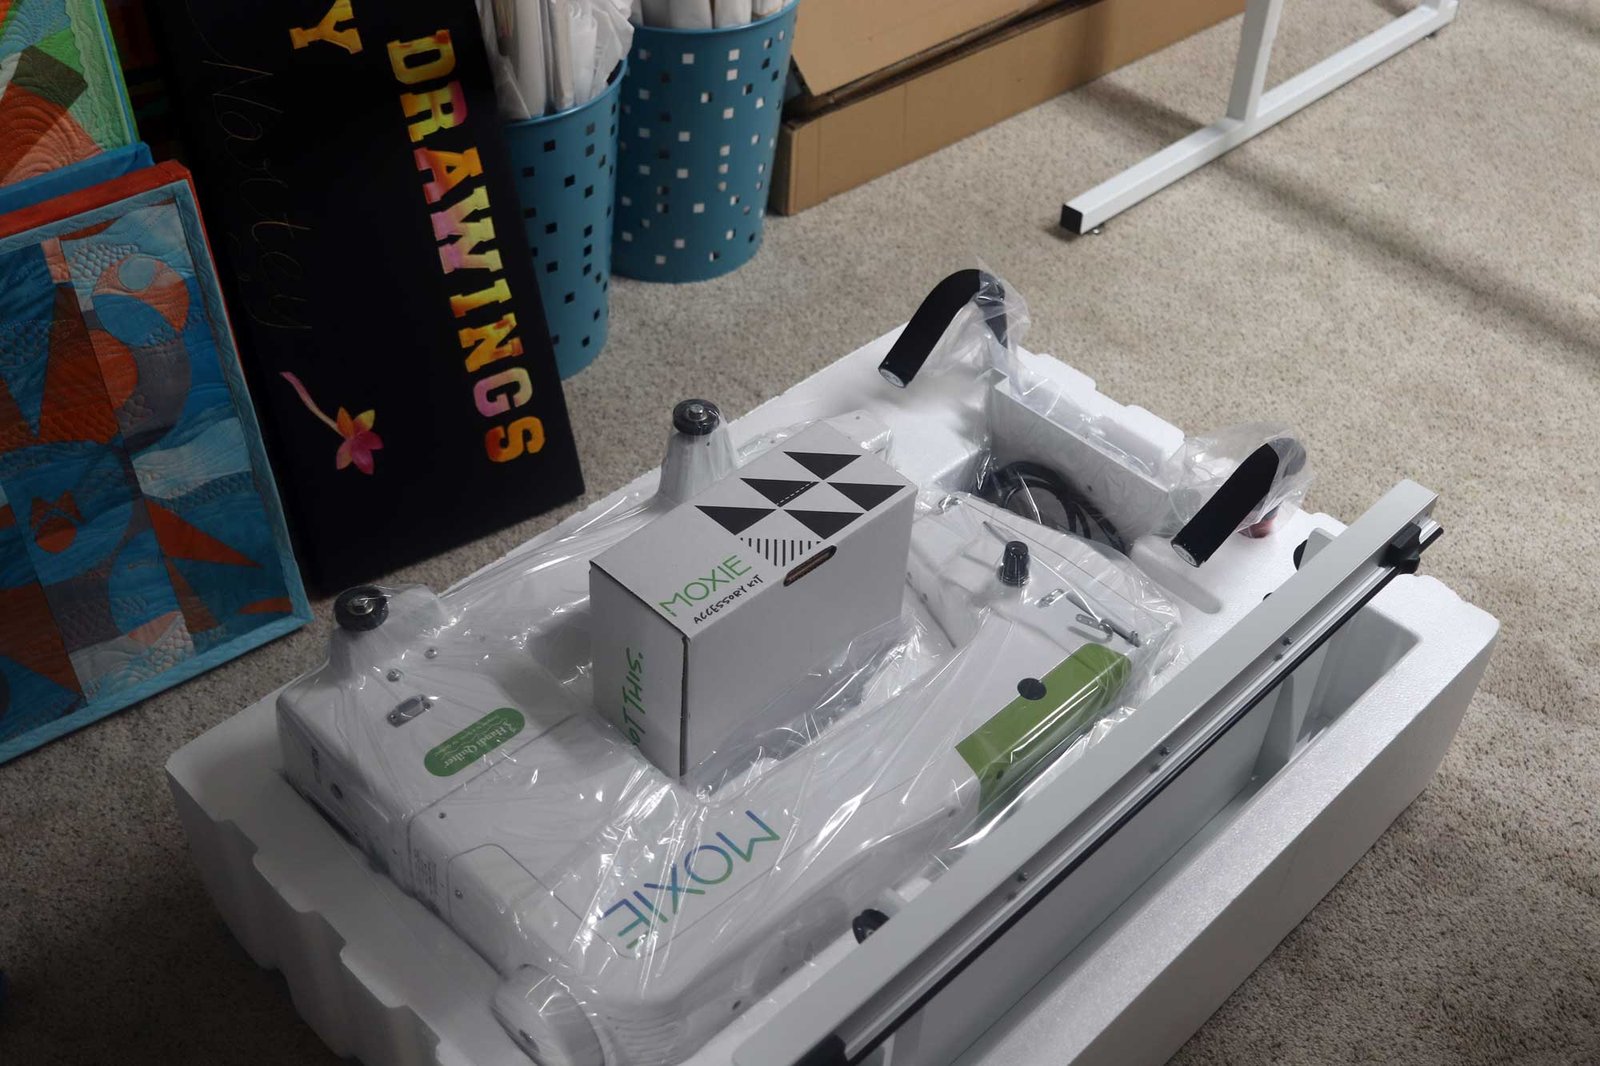
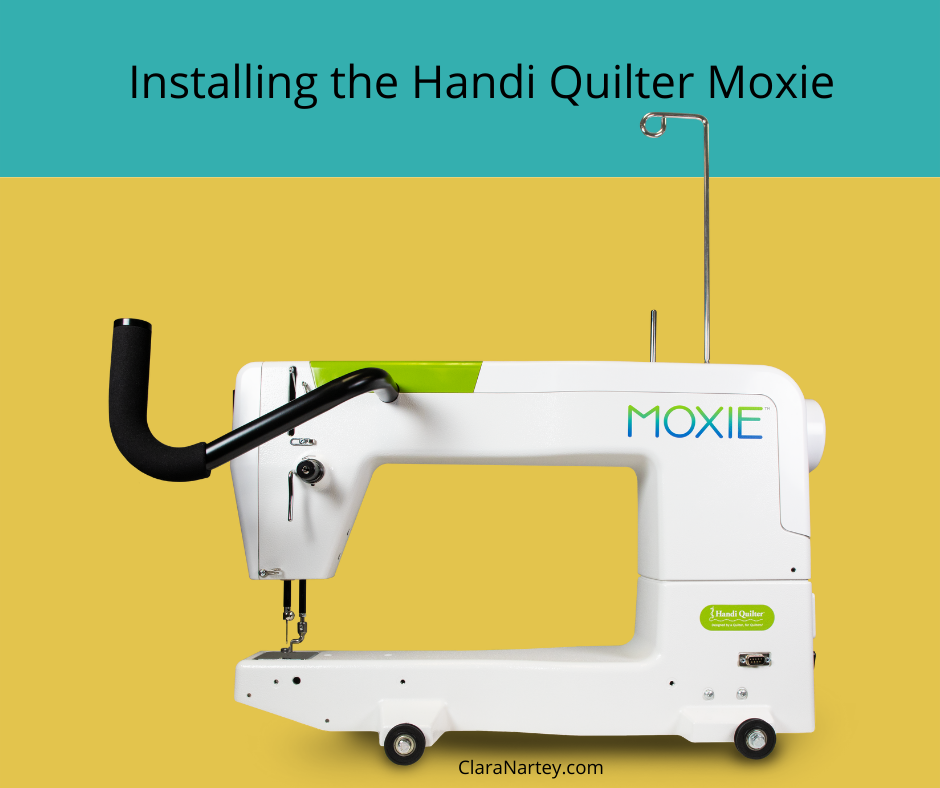
Then, the moment of truth came and the Handi Quilter Moxie was pulled out of its box for us to see it. It’s a beautiful machine. Light weight and not very big. It’s throat space is 15 inches which is almost twice the size of my old faithful. It’s budget friendly, not too many bells and whistles – a perfect transition to longarm quilting if you’re used to quilting on a domestic machine like me.
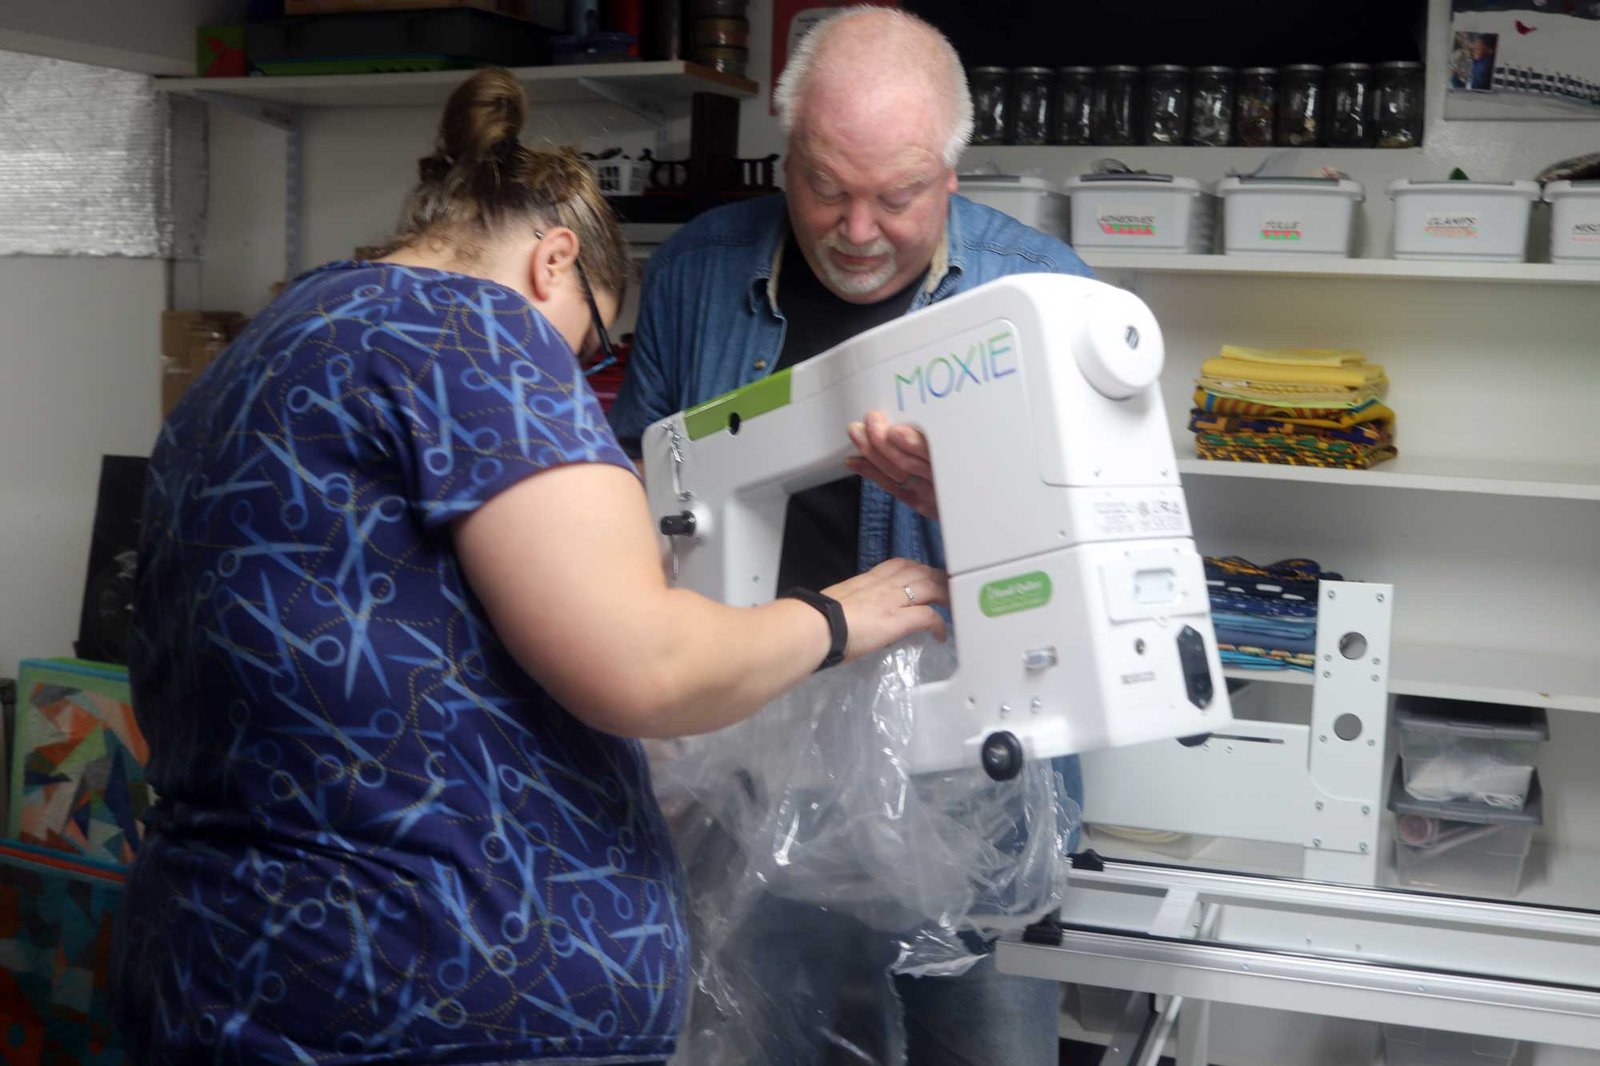
Setting up the sewing machine
The Handi Quilter Moxie comes with a useful accessory kit that includes a standalone bobbin winder, threads from Superior Threads, practice fabric. and bobbins, among other things.
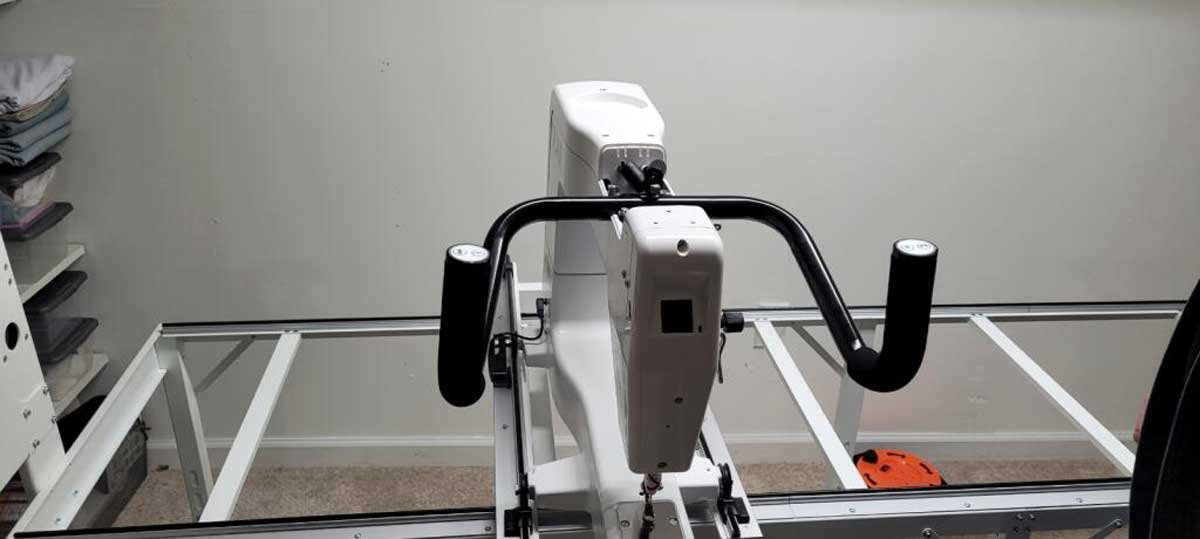
When you look at the photos of the machine in the box, you’ll notice that the handle bars are separate from the machine itself. So after Jessica and Gary had placed the machine on to the carriage, they had to attach the handle bars separately. It involved removing that lime green rectangle on top, screwing in the handle bars and then screwing the green plate back on top.
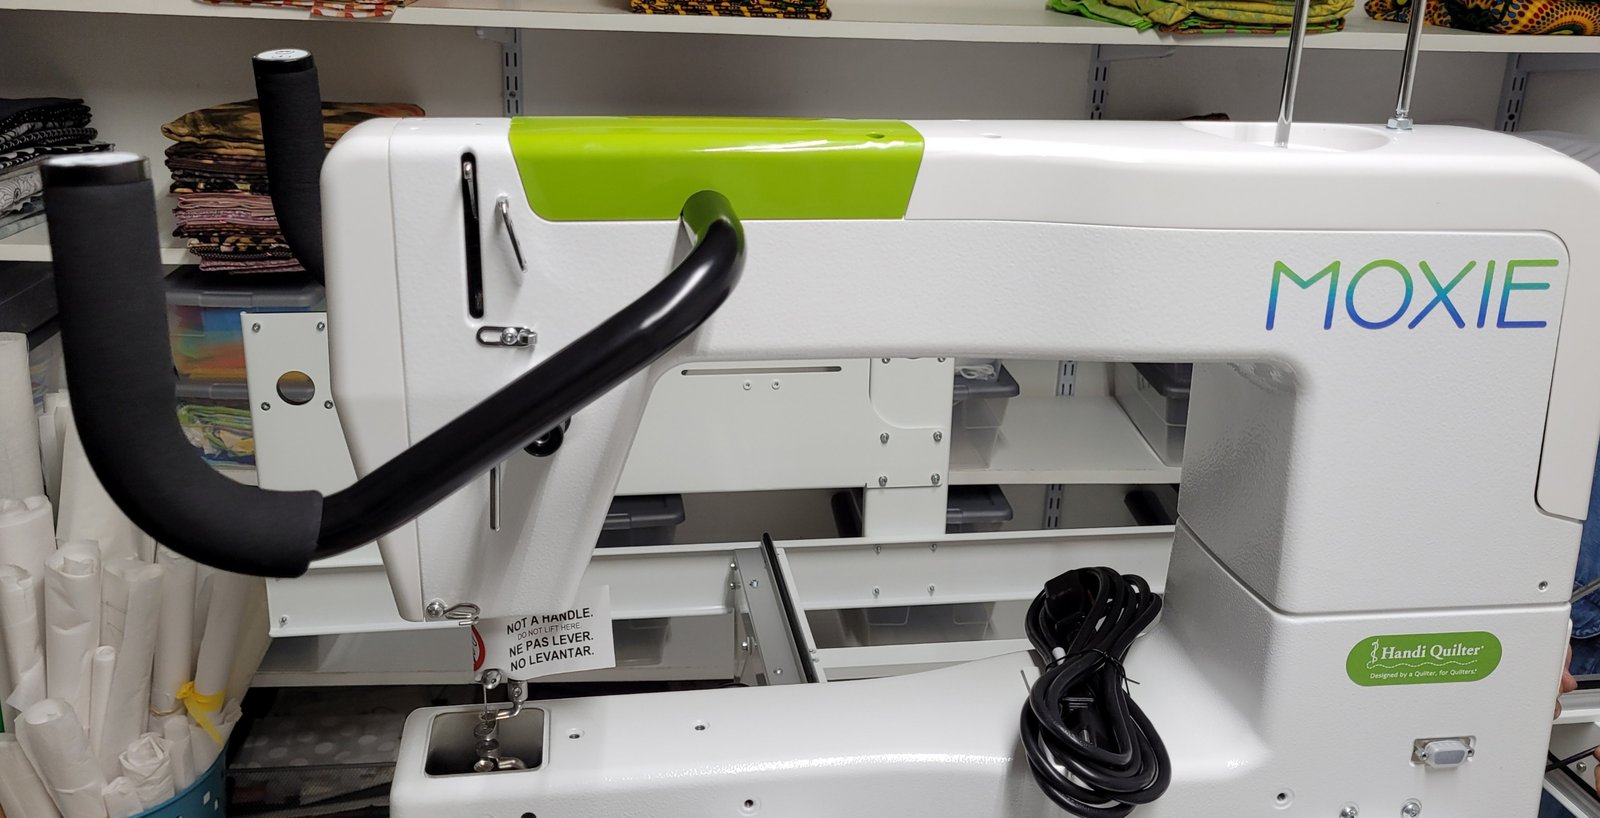
After that, all that was left to be done was to assemble the poles, put them through the machine and then attach the leaders.
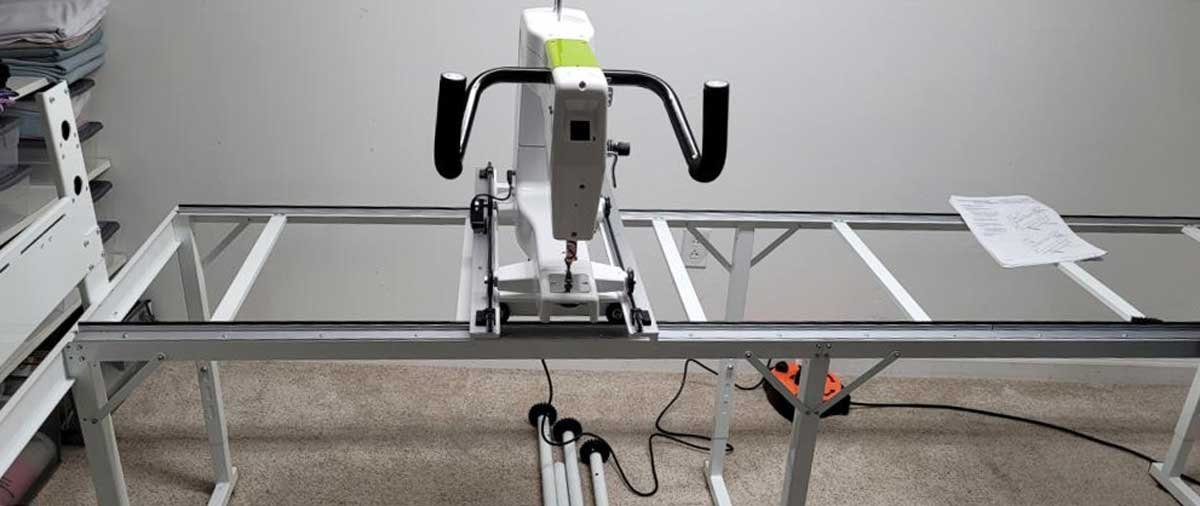
For anyone who’s new to a longarm machines like I am, let me explain. The poles are passed through the machine and held by the ratchet assembly at the two ends of the frame. If you watch closely, you’ll see holes at the end of the frame. This is where the poles will stop.
After, this then you can attach the leaders to the poles. The leaders are long strips of fabric that you attach to the poles with velcro. Then when you’re ready to load up your quilt on the longarm, you’ll pin each individual layer of your sandwich (top, batting, and backing) to to each leader( or cloth strips). That’s how your work is set up for quilting.
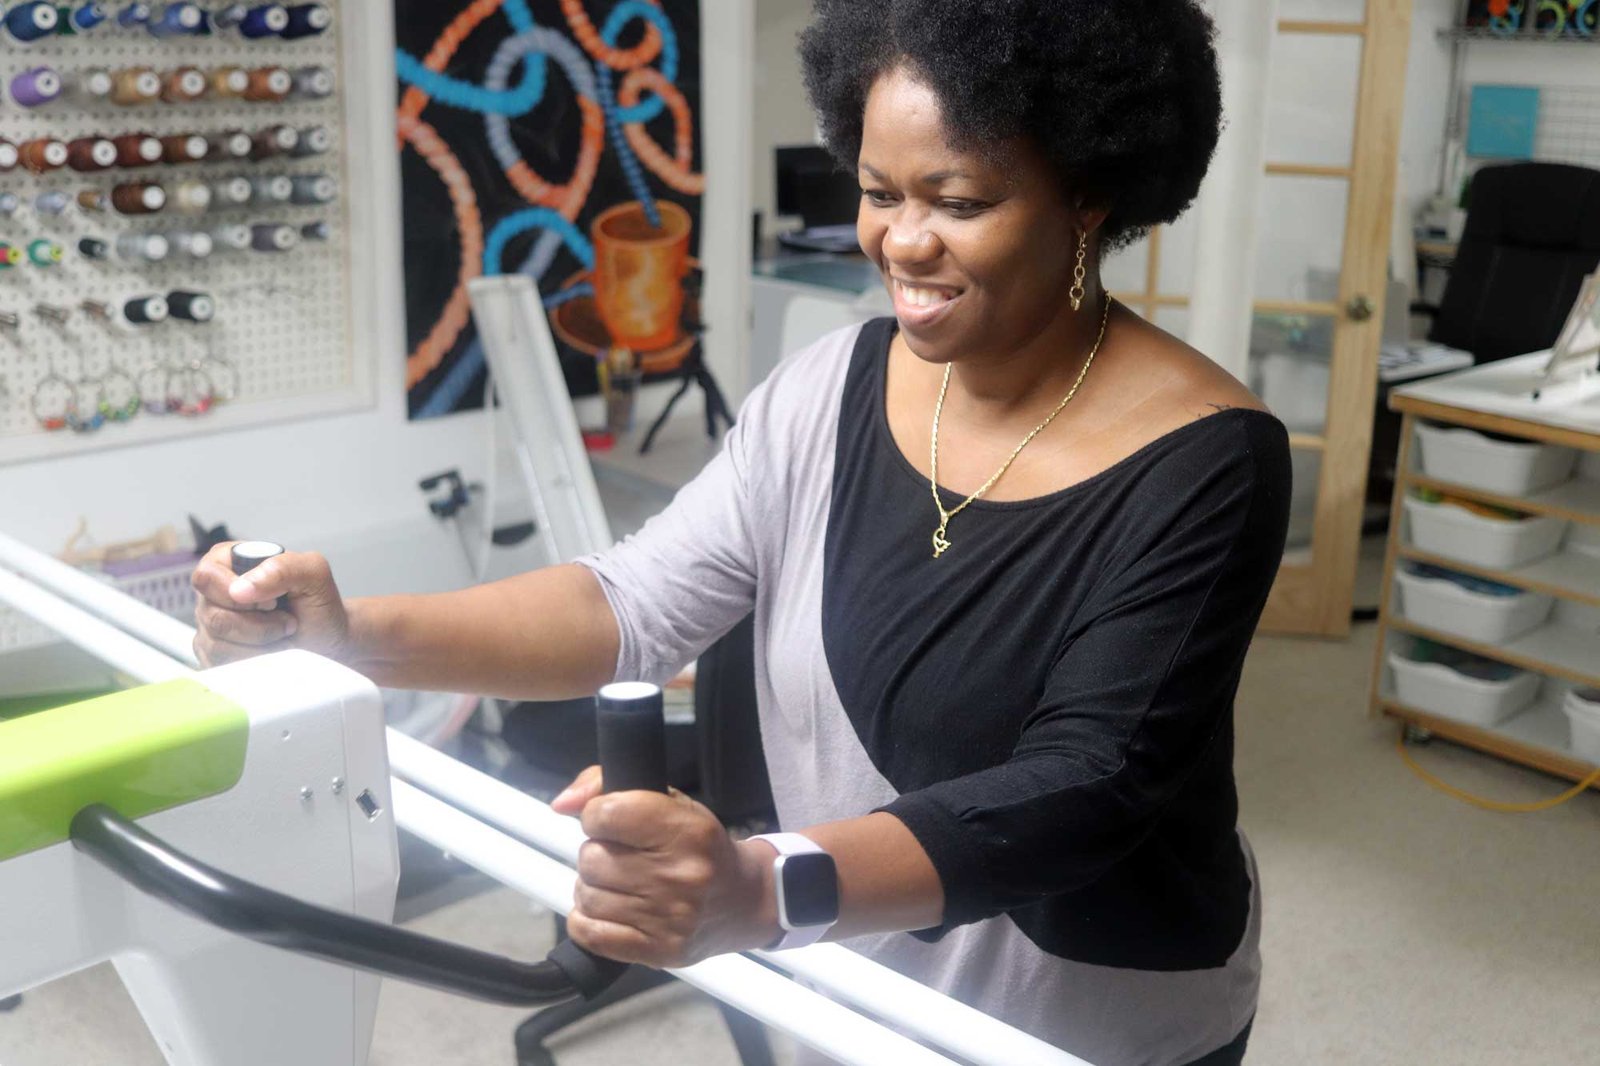
It was one long day
By the time we got to this point it was dark outside, we’d been at it for hours and we just couldn’t complete the installation for more reasons than one.
So, we decided to finish up and do the basic Getting Started on Your Moxie training the next day.
It was a long day. I was tired by day’s end. This wasn’t the last thing for me to do that day. I still had some previously scheduled video meetings to attend. I took a couple of photos with the Handi Quilter Moxie and that was it. The day ended with me not getting to play with my Moxie.
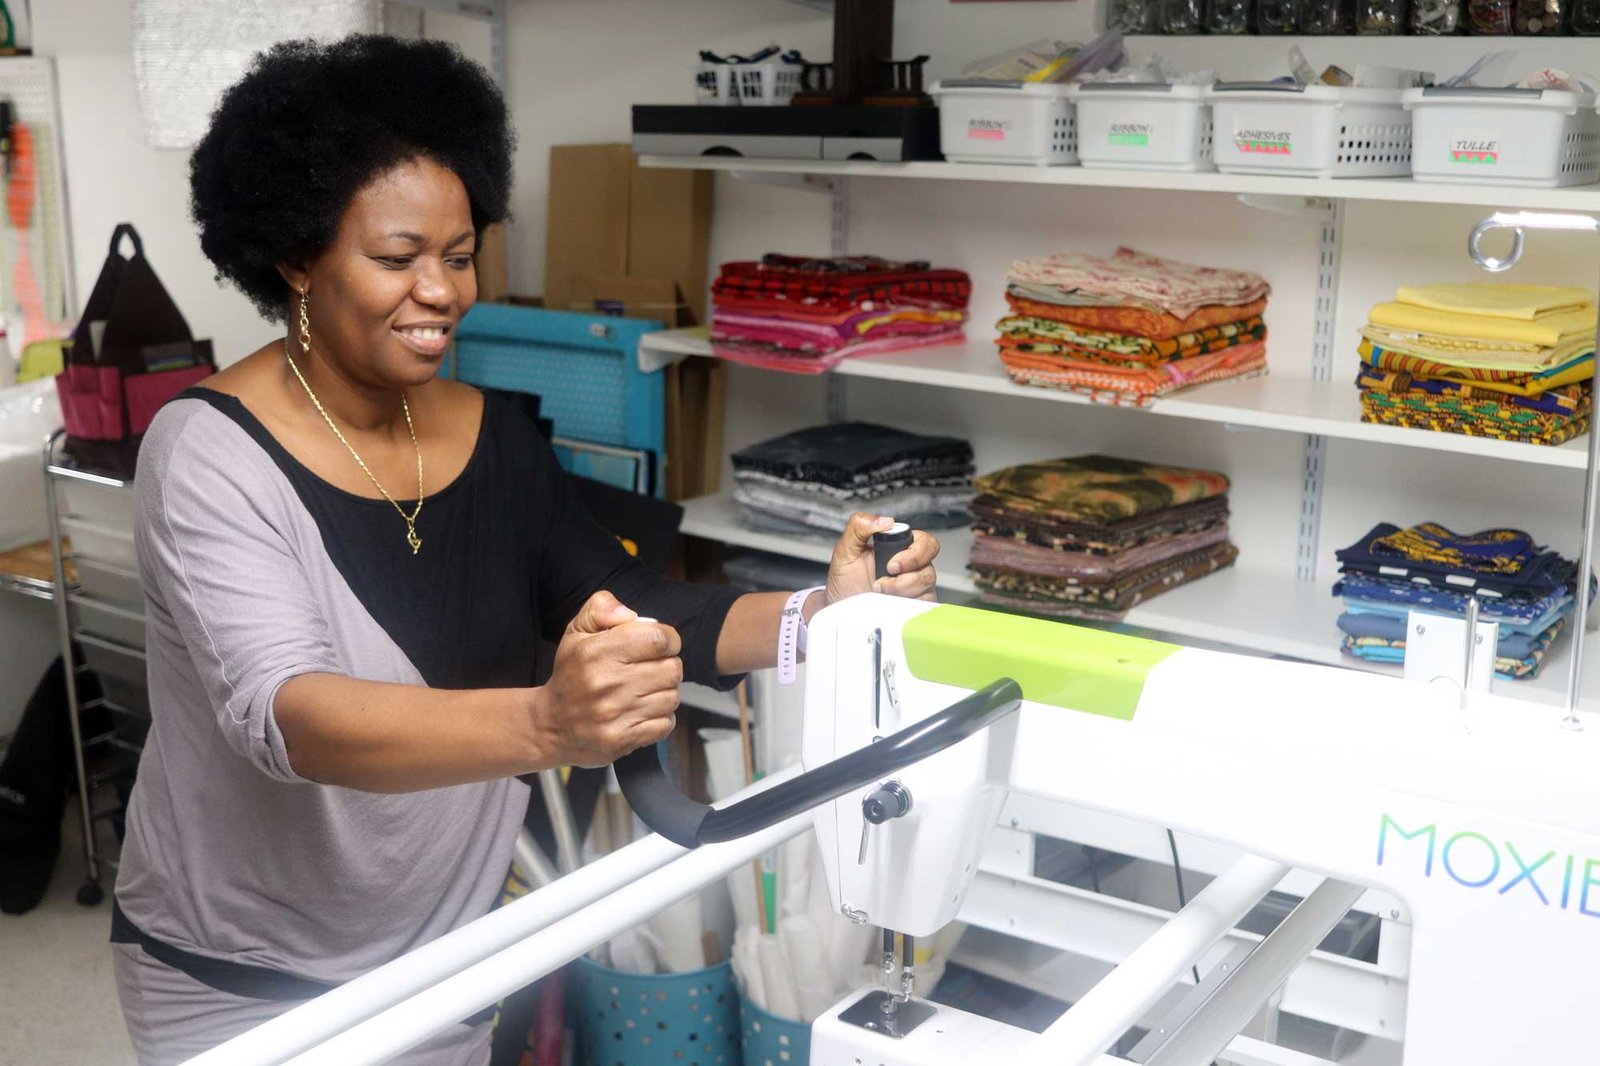
It was all good. I got my basic training the next day. I’ll tell you all about that in my next post.
If you’re enjoying these posts, please let me know in the comments and share with someone.
To see all the posts in this Handi Quilter Moxie series go to My Moxie and Me journal.
Warmest Regards,
PS: My installation from my local Handi Quilter reps was made up of two people. so that was great. Although, just one person can do the installation, it will take you a lot of time. If you’re planning on doing the setup by yourself, estimate about 4 to 5 hours for it.
Hey Creative Friend, In my previous post, I told you about my decision to upgrade my thread painting machine. In this post, I’m going to tell you all about the preparation I made to welcome my new Handi Quilter Moxie. So, go grab yourself a cup of your favorite beverage and settle down to read all about Making Room for the Handi Quilter Moxie.

A Thread Painting Experiment
So, in the last post, I told you how my thorough research into which machine to buy for thread painting my large portrait pieces took an unexpected turn. I ended up choosing the Handi Quilter Moxie over the Handi Quilter Capri which was my initial favorite. Using the Hand Quilter Moxie to thread paint is going to be a real experiment for me. I have no experience in using a long arm machine nor did my research come up with anyone using a long arm to do the very detailed thread work I do on my portraits. So, all of this is novel to me and it’s really going to be an interesting ride. A true research experiment.

As a result, I want to take you on this adventure with me. How I got the machine, what I’m learning, how I’m adjusting or not and what I’m creating on my new Handi Quilter Moxie. Everything! Is that okay with you? Awesome! Let’s go!

So, when the good folks at Hand Quilter heard about my need for a larger machine, they graciously offered to support my work by providing me with one of their sewing machines. Yipee! I can’t tell you how excited I was when I got that news.

When Thoughts of A New Machine Make You Dance
I mean I literally started dancing. Hands in the air and body swaying kind of dancing. 🙂 I danced on the zoom call with the folks from Handi Quilter – I mean folks I’d never met or spoken with before. Yes. I was that overjoyed.

Finally, after weeks of discussions, it was time for the Moxie to be shipped to me. If you’ve seen photos of my studio before, you know it wasn’t originally set up for a longarm machine. I have two large tables with storage underneath them in my studio. Each table is about 5 feet long. That’s pretty long – almost as long as the 8 foot frame that ships with the Handi Quilter Moxie. There was no way I could add the new machine without moving things around.

Let the Reorganization Begin for The Handi Quilter Moxie

So, move things around, I did. And boy, did it take me way too much time than I was willing to commit to that project or what? It took a full week of reorganizing to get things in a reasonable state. To be honest, I didn’t want to do that work, but I had to. I’d rather have used my time for something else. But there was no way around it. So, I devoted the time to it.

Originally, my studio had two distinct sections. One section was my sewing nook. It had my sewing machine, cutting table and shelves with fabrics. The other part of the room was my office/teaching/recording studio. It had my desk and computer, my recording equipment – studio lights, tripods, and other recording related materials and another large table.

Deciding where the Handi Quilter Moxie will live in my Studio
I decided that I wanted to add my new Handi Quilter Moxie to the sewing nook in my studio. I like to group similar activities together in my studio. It makes life easier. What that means though is that, I couldn’t keep the large table and all the shelving for my fabrics. So, I decided to keep one wall of shelves instead of two. So I took the fabrics down and removed the shelves on one of the walls. Moreover, I pushed the large table (it’s on casters – I couldn’t have done it otherwise) into the recording studio.

It was a mess.

I had stuff all over the place. Things that I had removed from one place which no longer had a place to go. I’ll look at the mess on several occasions and ask myself what did I get myself into. I have a ton of things on my plate. Reorganizing my studio is not one of them. Then, I’ll remind myself that organizing comes with the territory. If I want to get a new sewing machine, then, I’ve got to make room for my new longarm. It’s a mental game. In fact most things are.


It’s a Mental Game
If you can overcome the battle in your mind, half of the battle is won. I haven’t reorganized my space in years. So, I began to see this as an opportunity to fine tune how things worked around my studio. After that mindset shift, it was just a matter of showing up everyday and devoting several hours to the reorganization. Eventually, I got it done.

It involved partially tearing up the space, making new homes for displaced items, and then relocating displaced items into their new homes.

Finally, I was able to make room for my new Handi Quilter Moxie against one of the walls in my studio (Remember where I’d previously taken out the shelves for my fabrics? Yep!). Now, all that was left, was for the sewing machine to arrive. The day came when the delivery man arrived with three large boxes for me. Actually, I’d been waiting for the doorbell to ring. When it did, I was beyond myself. I was both anxious and excited. When I brought the boxes in, I decided to not open them until the Handi Quilter installation team had arrived.

Meanwhile, the team wasn’t scheduled to arrive for several days. So, it took a lot of self-control not to open the boxes prior to their arrival.

Here are some things I learned from re-organizing my studio.
7 Tips for Reorganizing your Studio
- Keep what is working. No need to tear down everything
- Create a home for new things and displaced items
- Group similar things together for easy retrieval
- Move displaced items into their new homes
- Let go of things which no longer fit into your new vision for your studio (donate or gift to others)
- Don’t aim for perfection. Aim for functionality.
- It’ll take you longer than you think (budget time for it)
Oil Paints and Supplies Giveaway
After Handi Quilter Moxie Reorganization

Talking about letting go, I had to let go of a lot of stuff. My painting supplies was number one on the list. I had a ton of painting supplies, brushes, oil paints, watercolor, acrylic paints, palettes, carrying case and so much more. I decided to let go of all the oil paints, cleaning agents, and most of my brushes. I’ve packed them up ready to be gifted to a deserving young artist. I also gave away two sewing machines which I’d never used. I knew that after years of not using them, there was very little chance that I’ll use them in the upcoming years. So, I donated them as well as some other tools. Hopefully, they’ll bring joy to someone else’s life.
I still need to find someone to give my oil paint supplies to. I want it to go to a young adult who loves art and who could really use the help in getting supplies to practice with. If you know someone like that, please let me know.
That’s it for now.
In the next post, I’ll tell you how installation day went.
Warmest Regards,
PS: Here’s where to find every post on my new machine. My Moxie and Me Journal
Hey Creative Friend,
If you’ve been in this community for a while you probably know that my thread painting machine is a domestic sewing machine. I’ve enjoyed several years of work on my beloved sewing machine. It’s a workhorse. It’s been kind to me and has served me so well, I really have nothing but great things to say about it.
I learned to quilt and thread paint on my first sewing machine which was an embroidery machine – a Babylock. Then I upgraded to the current one I have – a Juki 2010Q. And boy was there a marked difference in speed, quality of stitches and durability. I sewed for 10 hours plus several days in a row without any worries that my sewing machine will not be able to hold up.

I continually thank God for the day I decided to buy my Juki. In all the years I’ve owned it I’ve put it through constant rigorous stitching with very little downtime. Yet through all the years, I’ve only had an issue with my Juki just once. And as soon as I found a qualified repair man, I was back in business in no time.
When I was in the market to upgrade my first sewing machine, the Babylock, I did a lot of research. I wanted to be sure that whatever I got will serve the purpose that I needed it for. I must say, all that research turned out to be worth it, when you look at how well my Juki has performed over the years.
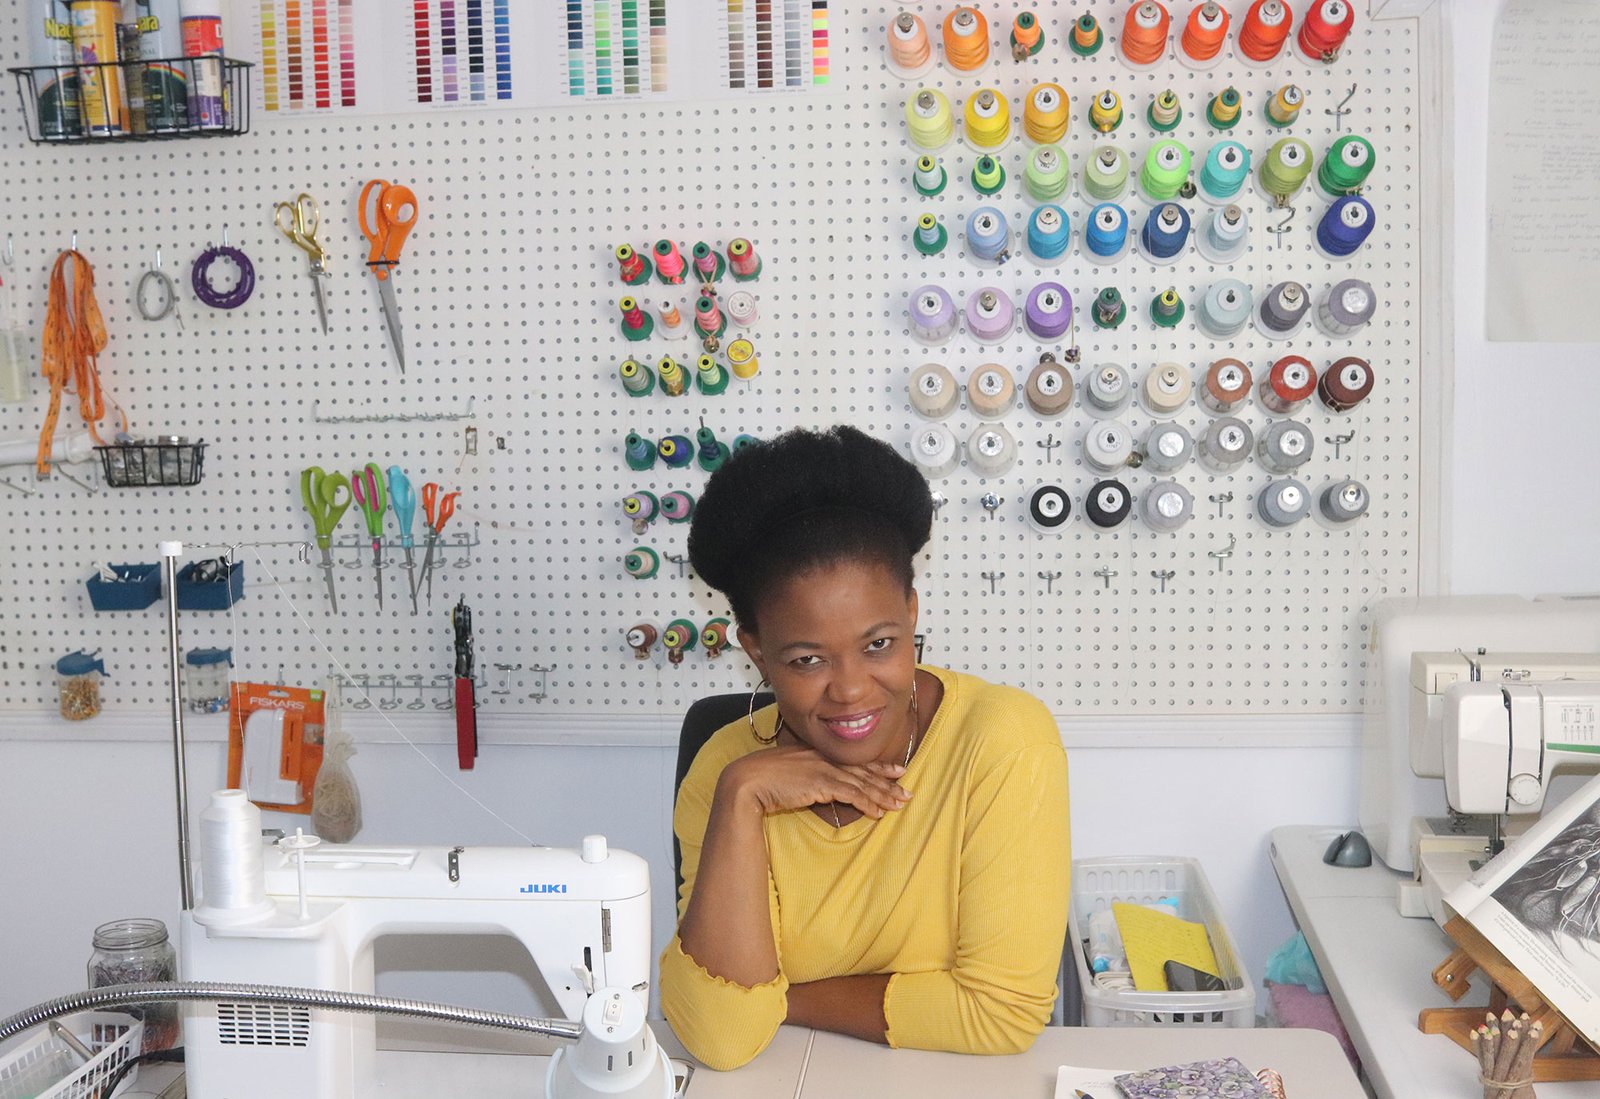
However, at the start of this year, I started thinking about upgrading my Juki. As I’ve just explained, I love my Juki. There’s nothing wrong with it. It’s in great condition and it’s not giving me any problems. Which if you really think about it, is a testament to how versatile this machine is. Because truth be told, I put this machine through the wringer.
Reason for Upgrading My Thread Painting Machine
However, my circumstances have changed. I’m not in the same place I was several years ago when I was just starting out learning how to do free motion quilting and then later thread painting. Now, I’ve mastered those skills and more than that, I’ve gotten to the place where I want to explore more as a result of this growth. As I alluded to earlier, in the beginning of the year, I started thinking about expanding my work by creating larger portraits. And this is the reason I decided to upgrade my machine.
As much as I love my Juki, it wasn’t built to grow with me into my new adventures into large scale portraits. The throat space for the Juki 2010Q is only 8.5 inches. Which means working on large pieces like Amandla – The Empowered Woman and I am a Child is a real challenge. Pushing that size of work through the small throat space is a big strain on my shoulders. After hours of sewing, my shoulders are sore and I need a good massage. Secondly, pushing the work back and forth through the Juki inadvertently results in the quilt layers shifting. What this means is that it’s very easy to have puckering and uneven feeding of the layers through the machine. So, this is why I needed to upgrade my beloved machine.

Searching for a Thread Painting Machine
Just like I did before buying my Juki, I’ve spent a lot of time doing a thorough research on what will be the next best machine to buy for thread painting my large-sized portraits.
At the end of my research, I concluded that it had to be a sit-down longarm machine. There are many types of these machines in the market right now. They’ve been around for a while but they seem to be getting more and more attention recently. If you’re wondering what they are, here’s the cliff notes on sit-down longarm machines.
What is a Sit-Down Longarm Machine
Sit-down longarm machines are different from regular sewing machines in that they have larger throat spaces. That is the area between the needle and the vertical part of the sewing machine. Basically, it’s the area within which you can maneuver your quilt through. As I said, my machine has only 8.5 inches for me to work with. Sit-down quilting machines, which are also called mid-arm machines have anywhere between 15 – 20 inches of throat space for you to work with.
As you can see there’s no comparison.
The larger throat space means less stress on your shoulders and upper body as you don’t have to struggle with moving heavier quilts through a tiny space as much as you do on a domestic machine. Also, these machines have larger motors and are therefore faster. This makes the sit-downs perfect as thread painting machines. This is why I decided to go with a sit-down (aka mid-arms). After doing my research, I decided I wanted a Handi Quilter Capri. I felt it was the one which will serve me best, I liked the quality, the features, and more especially the customer service and community around it.

Then, just when I’d finalized my decision to go with a Handi Quilter Capri, something interesting happened.
At the time, I was working on a large thread painting piece, This piece involved a great amount of thread work and I struggled with keeping it flat. The problems I experienced in trying to prevent the layers from shifting as I was sewing on my domestic machine and trying to make sure the piece didn’t get distorted got me thinking. I realized that if I wanted to create works that are larger than the one I was currently working on, which I do, then, I may not totally solve the uneven feeding of the different layers of my work with a sit-down machine. Because I’ll still be pushing and pulling the work through the machine. Say what?
My Decision to Switch from a Sit-Down Longarm Machine
Yep. I did an about face on my decision to get a sit-down long arm.
The thing is, I was very sure if I wanted to do thread painting on medium to large sized pieces, my best choice will be the Handi Quilter Capri – hands down. I had no doubt about that. It’s a great machine. However, at the time, I suddenly started to think of a large scale project (several feet wide) that I’ve designed in my sketch book. I started wondering if I could realistically thread paint that piece on a mid arm. I wasn’t very sure about that. So, I changed my mind.
Yes. Just like that.

I chose to go with a longarm machine instead. It was a hard decision to make. I haven’t used a long arm before. I couldn’t find anyone who used a longarm as a thread painting machine to do very detailed thread work like I do. It didn’t make sense to go with this choice. But that’s what I did. I was scared I was making the wrong decision. There were many times when I wanted to change my mind and stick with the Capri because it’s the safe choice. It’s been tested. Many people use it for thread painting and it does an excellent job at that. But I stopped myself from stepping on my own feet. I stuck with my decision to get a long arm machine for creating very large-sized thread-painted portraits.
I was fully aware that it was a risky decision and one that may not give me the results I wanted. But I was willing to take the risk. I’ll tell you more in my next post.
Until then, make time, create your best work and share with the world.
Here’s a journal, where you can find all the entries I make about my relationship with my new Handi Quilter Moxie. Go check it out. My Moxie and Me Journal
