
Hey friends, I had a pop-up studio during New Haven’s city-wide open studios dubbed Open Sources. I was at the Bregamos Community Theater for my open Studios. In this month-long art festival hundreds of artists from across Connecticut open their doors to the public to exhibit their work and offer a peek into the creative process.

My assigned space – Bregamos Community Theater is next to Erector Square, which is a former toy factory building now home to dozens of artist studios. This proximity meant those of us artists in Bregamos Community Theater could enjoy some of the heavy foot traffic from Erector Square. On the other hand it also meant that some visitors may tire after going through the very large Erector Square and may therefore not come visit us. However, I was banking my hopes on the former rather than the later.

Getting ready for the day of the open studios was a lot of work. I had artworks ready to go. So, that wasn’t an issue. It was getting all the other things that go into setting up in an art festival that were. My biggest task was getting one piece of artwork framed in this creative way that I’d come up with. You see, folks are always asking to see the back of my work. So, I came up with a framing idea that would allow people to see both the front and back when the piece is framed.

Executing my idea though, took a lot more than I’d anticipated. It required a lot of design sense, trial and error, and collaborations. Oh, and of course, several runs back and forth to the home improvement and art supply stores. By the time the paint was dry, well I only had a couple hours to spare. But I made it work.

You’d think that working down to the wire, I’ll be late for the opening. Nope, your girl arrived before the doors opened. Setup was brisk and friendly. The owner of Bregamos Community Theater, Raphael Ramos was so gracious and willing to help in anyway possible. He climbed ladders to adjust lighting, moved chairs and tables around to make room for artists. He was an immeasurable help. Also, Gabe from Artspace– the organizers of open studios- was also very helpful.

The first day of open studios was a little slow. It was a beautiful autumn day. However traffic was slow. The second day, though, made up for what the first day lacked. Although it rained on the second day and the weather wasn’t that great (I had to wear my jacket most of the day), traffic was good.

All in all, it was a great event. It was so worth my time. Going in, I wasn’t sure whether it will be worth it or not. Right until a couple of days before the event, I was still debating whether to participate or not. Yes, planning and getting organized for the event took a lot of time away from my studio practice. But, like I said, it was worth it.

I met so many people. And I got to talk about my work for two days straight with people who were intrigued and interested in the work. People I would never had met if I’d stayed in my studio. Gallerists came by. Curators came by. Other artists came to chat. And art lovers from all over the state came as well. It was amazing. Going out, showing your work, and meeting people is a necessary part of being an artist. To all of you who I met at open studios, a big thank you for stopping by.

And to you my artist friends, I know it’s hard for a lot of artists to do this because we’re often introverts. But you can start slowly. Get your feet wet in small events and then grow from there. If you want to be a professional artist, showing your work, meeting people, and talking about your work comes with the territory. And we can all learn to do this no matter whether we’re introverts or extroverts. Friend, if I can do it, you can too.
Warmest regards,

Hey Creative Friend,
Let’s chart a path for your self-growth. In this post, we’re going to discuss a path to your artist’s self growth. We’ll look at three distinct stages and what happens in each of these three stages.
First, let’s start with why do we even have to go there and talk about artist self growth? The way I see it, as a human being, you’re always doing one of three things
- Stagnating
- Growing, or
- Dead
I think it’s easy to say that we all want to be in the second group – growing.
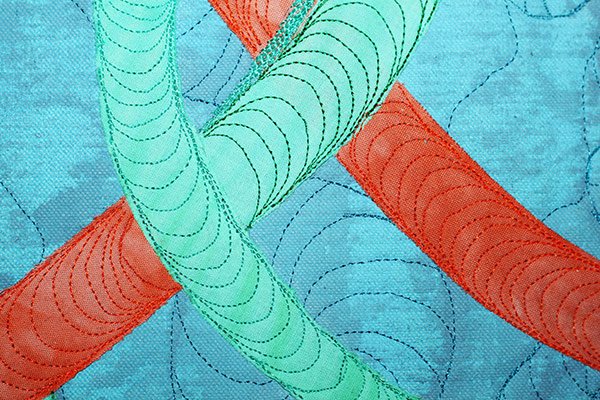
Recently, I’ve been experiencing a lot of growth as an artist. The reaction I receive as a response to this growth is varied. It mostly depends on how long people have known me. For instance, those who’ve watched my creative journey for years are amazed at my “fast growth”. On the other hand, those who’ve only recently met me, pause to pay attention to my “growth spurt”. And of course, there’s a whole range of other reactions in between.
The thing about this blog is that I’ve always wanted it to be a place to help my creative friends. So, if I’m experiencing artist’s self growth then, I want to share that with you.
As a result, I’m going to share with you three main stages that I’ve noticed an artist goes through on the path to self-growth.
3 Stages of an Artist’s Self Growth
1. Motivation and Mindset
The first stage in this process is what I’ll call motivation and mindset. This is the beginning stages of your journey as an artist. This stage determines whether you get into the game or whether you stay on the sidelines watching others play the game. To clarify, this stage has nothing to do with whether you have the skills you need or not. It has everything to do with what you believe about yourself.
For example, do you think you’re too old or too young to pursue an artistic path? Do you think you need years of additional education before you can even start to express yourself creatively? Certainly, what you think about your artistic or creative skills impacts what you do. Whether you get started or not depends on your motivation and mindset.
2. Personal Practice
This is the belly of the journey to an artist’s self-growth. When you’ve overcome motivation and mindset issues and finally decided to jump in the game, you’ve got to hone your craft. However, honing your craft does not start with your craft. It starts with time. In this busy society where anything to do with creativity or slowing down is relegated to the back burner, you’ve got to fight to carve time for your craft.
Consequently, I find that many potentially great artists get lost right here in the middle of the journey. Fighting to carve time for your craft is only the beginning. After that, what you do with the time you have is equally important. This is where developing your own creative practice becomes super important to your artist self-growth. Practice brings progress. Having a consistent practice will help you develop a body of artwork that will test, prove, and grow your technical skills. An artist has to create art. This is the stage where that happens.
3. Share, Show, and Soar
Now that you’ve created a body of work from your consistent practice, it opens you up to a whole new set of possibilities. As a result of your hard work in the second stage, you start enjoying some rewards. People around you start seeing, probably for the first time, your potential. As an artist, you start becoming more confident in your own abilities.
Consequently, opportunities to elevate your work become abundant. This is where you begin to soar. Not only are you more confident to share your work, show in exhibitions, or sell for money. But others want to help you show, share, and sell. Your work becomes a magnet. It attracts people who either want to purchase your works, publish in their media outlets, or put your work on stages that you can only imagine. From here, who knows how far you can soar? You may reach for the stars if you’re bold enough to dare.
So, here you have it, three stages of an artist’s self-growth.
Friends don’t leave friends behind. I’m growing in my art and I want to grow with you. Below are additional in-depth resources to help you grow with me:
- For Mindset and Motivation, take my course Clarity to Create
- Time Management and Building a Personal Practice, take my course Time Mastery
- For Showing Your Work, read these articles – Show Your Work, and Behind the Scenes of A Solo Show
- And finally, for Selling your Work, these Business Interviews are a great starting point
That’s it Creative Friend,
Chat soon.
Love,

Hey Creative Friend,
- Are you tired of taking so many classes – learning such interesting techniques but not finding time to finish the projects you started in class or even practice those techniques on your own so you could master them?
- Do you buy tools, gadgets, and art supplies and then leave them in the packaging and don’t use them because you haven’t found the time to try them out?
- Are you a creative business owner who misses opportunities to collaborate or grow your business because you’re overwhelmed with working in your business instead of working on your business?
- Do you have all the time you need, in fact everyday feels like Saturday for you, but you’re not getting much done?
- Have you become a captive to deadlines? Are deadlines controlling your life
Imagine if you could …
- shave a few hours off your busy schedule every week and devote that to your creative work
- look at your todo list and not feel apprehensive but know exactly how to get those things on your list checked off
- practice your techniques, finish your projects and see tremendous growth because you’re spending a few more uninterrupted hours every week working on them
- be less stressed and more in control of your creative business because you’re managing your time better
- feel accomplished at the end of your week because you were not just busy, but we’re able to get things that really moved the needle for you, done ✅
In Time Mastery for Creatives you’ll learn how to plan your weeks, how to find time and devote it to your creative work , how to setup routines that will help you not fall off the wagon but become consistent .
Consistency in life, whether in your creative work or your creative business, leads to progress.
And progress is one of the greatest motivators I know.
Seeing yourself do things you thought were out of your reach will put a sprint in your step.
Self motivation will get you to keep at it. And that consistency will produce more progress and there you have it – your very own growth engine fueling you to do great things.
But it all starts with mastering your time so that you can work consistently.
Your Personal Growth Engine

Consistent Practice—->Progress——>Motivation——>Consistent Practice
Imagine if this growth engine is working in your life? What would the compound effect of progress be for you? Where will that growth take you? Time Mastery opens for enrollment in 12 hours. Learn to Master Your Time so that you can Master your Craft.
Fast Action Bonuses expire in 24 hours. Which means if you enroll in the first 24 hours enrollment opens, you’ll get a special bonus. It’s a really good bonus. You don’t want to miss out on it.
Chat soon.
Love.
Clara.
(Create your best work and share it with the world)
PS: If you have questions ask in the comments below. I’ll answer each one of them.
Hey Creative Friend,
Today, let’s chat about the Artist Catalog. Recently, an artist friend of mine put together an impressive exhibition of her lifelong artist career. During the planning stages of her solo show, she contacted me for help with certain things. One of them was how to create an artist catalog for her show.
Today, I’ll like to extend that help to you. So that you can figure out how to create an artist catalog for your next solo show or even a group exhibit.

Why You Need an Artist Catalog
First, let’s start with why you need an artist catalog. Exhibitions are a wonderful way to showcase your work and invite people into your creative space. It gives them a window into your thoughts and ideas and an opportunity to see your work as a body. However, exhibitions run for specific lengths of time and they’re over. Done. No more to be seen.
This is where an artist catalog comes in. It serves as a documentation of the exhibition, it provides a permanence that a show can’t provide. And it is a great marketing tool to give to collectors and admirers of your work. I created an artist catalog for my solo show – Drawn with Threads and that catalog still lives on. New people are discovering me through that catalog.
A Print Catalog or a Digital Catalog

In this digital age, there are many electronic formats in which you could create an artist catalog or a documentation of your solo show, including creating a website for it with images, audio recordings, and videos. I encourage you to explore those options as well because of the easy access those formats provide to your viewing public.
Having said that, there’s something about seeing art in print, holding a book in your hands or displaying it on your coffee table that is totally different from consuming that same kind of information on an electronic device. For that reason, don’t miss out on an opportunity to create a print copy of your artist catalog.
What Goes in Your Artist Catalog?
Just as you have to curate your solo show, you’ll also have to curate your artist catalog. Creating a catalog requires some planning. First, what’s the theme you want the catalog to be about? Focus on that when you’re planning your catalog. Choose a piece of art that encompasses this theme or focus that you want to portray. You will use this art piece for your cover/ Title page. Speaking about title page, you need to come up with a good title that encompasses your theme. I usually like a short title that’s easy to remember and a subtitle for further description. The Title is usually the same as the exhibition title.
Next, let’s discuss essays.
Catalog Essays
It’s a good thing to include essays in your art catalog. Essays, lend a third person’s perspective to your artwork. Here’s how one essay writer – Maria Porges- describes essays:
“Catalogue essays are not about making something up. They are about finding the clearest way to describe and explain. The catalogue writer opens a door, makes the viewer’s experience of the work more meaningful and satisfying, and puts the work in a context that helps it to be understood and appreciated.”
Maria Porges
If you’re asking someone to write an essay for your catalog, it’s better to get someone who can do a good job, is interested in seeing you succeed, rather than a big name who wouldn’t take the time to do a half decent job. Curators, art critics, fellow artists are all good choices to write essays about your work for your catalog.
Now, you’ll have to put some information about yourself and your art career in your catalog. An artist statement and a resume will be able to take care of that informational content in your catalog. You’ll also have to have information next to the images of each piece in the catalog. Title, medium, dimension, year created.

Catalog Images
Talking about images, the bulk of your artist catalog will be filled with images of your work. Make sure to use clear and crisp high resolution photos for your catalog. There’s no point in going to all these lengths to produce a catalog with terrible images. Either have a professional photographer take the photos or if you’re good at photographing your artwork, then do that. Be sure to check with the printer to know what the smallest size of your images should be for optimum results. This way you can relay that information to your photographer or if you’re doing it yourself, you’ll be well-informed.
Putting it all together
Finally, you’ll want to have an acknowledgement page, where you show your gratitude to your supporters and all those who’ve helped your art journey in some meaningful way. Then summarize all the content in your catalog, in a table of contents page that appears at the beginning of the catalog.
Before you deliver your catalog for printing, have someone proof read it. I can’t tell you how many times, I’ve had catalogs proof-read by multiple people and yet the final output still had typos in them. Don’t print without someone else proof reading first. NEVER!

There are many formats in which to create an artist catalog. Take a look at a few and decide which format you like best.
When it comes to printing, you have a number of options. You could use one of the many print-on-demand options, where they print the exact number of copies you need at a particular time. The advantage of this is, you don’t need to store unsold book copies. Obviously, the other option is to have the printers print out advanced copies. Then, you keep an inventory of your books with you for future sales or distribution.
It takes work to put a catalog together. As with everything concerning your solo show, planning makes a lot of difference. My recommendation is that, don’t try to do everything by yourself. Get help and delegate some of the tasks. To learn more about putting together a great solo show, read my series on Behind The Scenes of a Solo Show. Scroll to the bottom of that page to find the rest of the articles in that series.
That’s it my friend.
Comment, ask questions, and let’s chat below.
Love.
Hey Creative Friend,
I got featured in a beautiful magazine called Quilt Folk. Quilt Folk is a special magazine, in that, it’s both a travel magazine and a quilt magazine. It’s a magazine about people, places, and quilts. It comes out every quarter.

The thing they do that makes it so different from other quilt magazines is their focus on one specific place at a time. In their most current issue #17, they traveled to the state of Connecticut, my home state. And I am so blessed to be one of those they chose to feature.
They did a story about my professional art organization SAQA (Studio Art Quilt Associates). And they chose to feature three of us SAQA members who live in Connecticut. I got the news in October last year from Quilt Folk’s chief editor – Mary Fons – that she’d chosen to feature me in the SAQA story. I was elated.
So, I’m going to share with you behind the scenes of how it all came together.
Quilt Folk Feature – Behind the Scenes

Remember that we were still in COVID times, last October. So ,planning photo shoots, interviews, and everything that goes into making a beautiful magazine like theirs was still a challenge. I learned that during normal times, the entire camera crew, writers, stylists and everyone, will travel together. Then, they’ll come out to your studio to do the interviews and take the photos they needed for a feature, in one session.
However, in COVID times, we had to do things differently. Zoom calls and emails had to replace live, face-to-face interviews. The camera crew was pared down. However, I couldn’t be happier with the crew I got. I had a photographer and stylist sent to my home studio and they were excellent. I’ll tell you more about these two ladies a little later.

Putting Plans in Place
So, arrangements were made, appointments were scheduled for when photos will be taken. I was assigned to a writer (Victoria), who will interview me for the article, she was going to write We fixed a date and time when that will be done. We did all of this over video and emails. (I don’t know what we’re going to do without video conferencing now that we’ve become so used to it. Our lives have been changed forever by COVID. We had such a terrible snow storm this week and my son didn’t have a snow day because , he had to do remote learning).
Anyway, now that all the plans had been made, excitement going through the roof, it was time to wait for the actual dates to come around and get the show going. I was both excited and nervous.
The two ladies, the photographer and stylist, Melanie and Kimberlee were awesome. I mean they were great. They were the only two I had in-person contact with. They made the experience so painless. It was not nerve wracking at all. When the arrived, I was ironing some one of my works to get it ready for photos in case they wanted to photograph it. So, I left the ironing, went out and brought them into my studio space.

The Photoshoot
And that’s where the photoshoot started. I wasn’t sure what they wanted to photograph and if they had a specific plan. I didn’t want to get in their way if they had plans. However, they made it a collaborative effort, pulling me in to help with how things were arranged and styled. By the time we were done with the studio, we’d turned it inside out, pulling this from here, fishing for that from there, it was just great.
After taking photos in the studio, we took some in other parts of my house and then went out into the yard. It was a cool fall day. The grass was wet but the sun was out. It was a nice day to take photos outside. When they were all done, I asked Melanie how many photos she’d taken. She told me she’d taken more than a thousand photos in that 2-hour period.
It was a fun experience. I enjoyed working with the entire team – Mary, Melanie, Kimberlee, Victoria, and Carmen. What an honor!

The magazine is currently available for purchase. It’s a beautiful magazine. It’s full of photos and very minimal writing. You’ll be inspired by both the photos and the stories in there. In my feature, you’ll learn all about my first encounter with what a hanging sleeve is used for. I’ve come a long way. I’m grateful to God for the journey. I appreciate the role SAQA has played in my journey and my development.
Team Quilt Folk – you did an excellent job. I’m honored.
Creative friend, you can grab your copy of the magazine from Quilt Folk’s website.
Warm regards,
PS: To learn more about what I like about SAQA and why I think it’s important to join a professional art organization, read this post.
Hey Creative Friend,
One of the things I love to do is read artist autobiographies and interviews. The other day, I was reading an interview of the feminist artist – Judy Chicago. I learned a ton about her from that interview. When I get the chance, I’m going to share a lot more of what I learned about her with you.
However, for now, I want to share just one thing about her work that I found really fascinating. It’s a community art project that she created called The International Honor Quilt.

I was thrilled to read about this. The thing is, I believe that a community art project is a really fun way for artists to get other people to experience art in their own personal way.
In 2019, I organized a community art project for the city of Milford, CT to go along with my solo exhibition Drawn with Threads. And I must say, to date, that’s the most meaningful exhibition I’ve hosted.

There’s something special that happens when you give everyday people the opportunity to express themselves and create something that is considered “art”. It just lights people up and brings out a part of themselves that they didn’t think existed.
The International Honor Quilt
So, what’s the International Honor Quilt all about? In the seventies, Judy Chicago had created a provocative feminist art installation called The Dinner Party. It is a ceremonial banquet arranged on a triangular table.
There were 39 place settings on the table. Each of them honored one artist. 999 women who didn’t make it on to the table had their names inscribed in gold on the white tile floor below the table.
The purpose of the installation was to honor female artists because women are not given the recognition they deserve. The installation was both provocative and popular. It toured the world. Subsequently, The Dinner party was permanently installed at the Elizabeth A. Sackler Center for Feminist Art.
One of the criticisms it had though, was that it didn’t include the names of enough female artists who all deserved to be honored.

As a result, Judy Chicago decided to create this project – The International Honor Quilt. This project gave people an opportunity make their own quilts to honor someone of their choosing. That project also became wildly successful.
At the time of Judy Chicago’s interview, they had received a total of 700 quilts from around the world. You’ve got to take some time to explore them for yourself.
A wonderful scholar named Marilee Schmit Nason, from Albuquerque Museum of Art and History, decided to initiate an effort to catalogue information on each of the quilt makers. As a result, there’s an amazing wealth of information on each little quilt in the big piece. I got lost in there while reading the inspiration of several of the contributors. Here are two examples:
Laura Baker, a writer from California, wanted to honor Joy Adamson. Adamson who after decades of living in Kenya, raised an orphaned lion cub called Elsa and then set it free. Adamson also authored several books including the bestseller – “Born Free” which was later adapted into film. Here’s the quilt in her honor.
Individual Quilts in this Community Art Project

Another woman, Susan Orange, from Ann Arbor, MI decided to honor all female artists. This is part of her statement:
“Too often women are not taught or encouraged to take themselves, their lives, their dreams or their creations seriously”.
Susan Orange
Then she continues to say,
“Our image as serious artists needs to be strengthened, not only by society but by ourselves as well”.
Susan Orange
I loved it. This is exactly why I teach and coach women to make time for themselves, so that they can do their best creative work. There’s so much we can do. If we only believe that we’re worthy of investing the time and money in our own creative development.
Here’s the quilt by Susan Orange

There are so many gems in that collection. I encourage you to explore the International Honor Quilt.
Furthermore, if you’re someone who shares your work, consider doing a community art project. Community art projects bring so much meaning to a community. They connect people together and leave a piece of artwork that is cherished by so many because they were involved in making it.
Also, more often than not, your community project will likely end up being preserved and protected because of what it stands for and what it means to the community. As an example, my community art project for the city of Milford, Connecticut is permanently installed in the town’s library.
The International Honor Quilt is Featured on PBS
Below, you can view a 5 minutes video interview and presentation of the honor quilts on the PBS show, “Sewing with Nancy”. Here’s the video

Five Things to Do to Create Your Own Community Art Project
If you want to create your own community project, here are five things to do:
- Find a community partner, for example, the library, a youth center, the town, a special interest group like a women’s group, a sports team, etc.
- Come up with an interesting idea that focuses on the community or group you identified
- Draw out a plan with the specifics of how you envision the project will be carried out
- Present your plan to the stakeholders or community leaders and share your vision to get their approval and commitment. Be willing to tweak your plan to suit the stakeholders
- Deliver on your promise. Remember: you’ll need help from others to make this come together. Judy Chicago didn’t do it by herself. Don’t try to go it alone.

Note, the better you’re able to paint a picture of your vision in your plan and your subsequent meeting, the more likely that you’ll get the support you need. As an artist, you can visualize what you want to create. Others can’t. So, you’ll have to paint that vision for them in order for them to buy in.
Finally, if you want to create art that’s not all about you, I hope you’ll consider creating a community art project for your community.

Question: What apprehensions do you have about creating a community art project? Ask questions below and I’ll answer them.
Love,
Hey Creative Friend,
Reflecting on all I’ve been seeing and reading about in art recently, 5 big trends in art stand out for me. You don’t need me to tell you that last year was a consequential year. I think that because of the kind of year we had, we’ll see some of the things which became necessities last year become norms now that we’ve tried them and seen that they’re not so bad.

For example, video calls are no longer the exception in how we communicate with one another anymore. They’ve become quite the norm nowadays. Similarly, certain art trends we saw last year are here to stay.
Five of these trends readily come to mind and that’s what I want to share with you today.
1. Craft Infused Art
Last year was a difficult year for most people. The pandemic, the economy and especially lockdown forced people to slow down and look for ways to distract themselves. Also, there was an urgent need for folks to find ways to sort out the complex feelings they were experiencing and discover new ways of expressing themselves. A lot of people started new hobbies, and journal writing. Some folks went back to old hobbies and creativity was at an all time high. In times of difficulty and uncertainty creativity has a way of calming us down and helping us to make sense of the world around us. And that’s what happened.

The return to crafting during the pandemic is unlikely to end after the pandemic. It’s here to stay for a long while. People aren’t going to instantly put away their woodworking tools, knitting pins, or quilting machines as soon as we’re out of the woods with the pandemic.
There’s also been a fusion or, shall I say, blurring of lines between art and craft that’s been going on in recent years that I’m definitely watching. Artsy writes about this trend where contemporary artists are using craft media and craft techniques to create figurative works – something they’ve termed Craft Figuration.
2. Virtual Exhibitions and Programming
I’ve been managing art exhibitions for the past 5 years. So exhibition development and programming are always on my radar. The pandemic forced galleries and art centers to rethink how to develop their exhibitions for the viewing public. We saw many of these organizations exploring virtual exhibitions for the very first time. A lot of artist talks were also moved to online video conferencing platforms.
Now that these institutions have been forced to make investments in software, and train staff to manage this new normal, we’re unlikely to see this go away very soon. Rather, I can foresee institutions making additional investments to enhance these experiences for their patrons. Even when we’re able to return to regular in-person viewing of art exhibitions, we can can expect to see that these virtual programming options as added features.
3. Diversity in Artist Representation

The death of George Floyd last summer, and the resulting racial unrest threw the topic of race back into the national discourse in a big way again. Our national reckoning with race issues saw individuals as well as corporations, large and small, make commitments to certain changes. One of those is more diversity and inclusivity. Although many did it because they didn’t want to look bad, they’re many more who’re truly committed to making changes to give people of diverse backgrounds opportunities to showcase their gifts and talents. As a result, I expect to see more artists from underrepresented groups being given the chance to excel. I can envision a richness in the art that we’re going to see in 2021 that we haven’t quite seen prior to this new(est) national awareness.
4. Artivism

A phenomenon that became pervasive last year was commentary art. Artists used their art as a tool of activism. The topics that artists covered ranged from politics, to race, to the environment and many more. Artists have always used their art to express their thoughts and feelings. However, last year, there was a palpable ratcheting up of artivism among artists.
This was very evident on social media platforms. I watched many artists on Instagram literally “find their voices” last year. I’m quite confident that this is not the end of this trend. We’re going to see more artists expressing themselves about the topics which are important to them through their art.
5. Marketability of Digital Art
Finally, trends in digital art are something I’m watching and geeking out over.
One thing I’ve been following with keen interest in digital art is what is called crypto art. If you’ve shared any image online, you know how it can easily be copied and re-shared without attribution to you. That’s always been a challenge for digital artists selling their work.

Secondly, proving ownership and provenance for an original piece of digital art was virtually impossible. How do you show that you purchased a piece of digital art and sold it to this person, who sold it to that person? Without that ability to authentic and transfer ownership, digital art didn’t stand the chance of being anywhere as marketable as physical art. Well, until now. Crypto art is trying to change that by giving artists the ability to do more with their work.
The purpose of this innovation is to give artists the ability to embed unique tokens with each piece of digital art they create. In other words, artists are able to sign their digital creations in a way that guarantees ownership.
This will give them intellectual property rights to their original works. Since the unique tokens (or signatures) will help you track who created what, when it was sold etc., authentication, ownership transfer, and bundling and sale of rights will become easier.

As you can imagine, this innovation is evolving fast. There’s still so much to learn. I’ve just scratched the surface. I don’t know everything there is to know about crypto art. I don’t know if it’ll ever become mainstream. But I’m excited to watch this trend develop, though.
So, there you have it. These are the 5 biggest trends in art that I’m watching,
Question: Do you have any trends on your watch list that you didn’t see on my list. Share your thoughts below.
Warmest regards,
Hey Creative Friend,
Today, I want us to talk about a topic you probably don’t want to talk about. If you’re anything like how I used to be, it’s probably one of those things that’s difficult for you to do. But hey, we’ve got to talk about it because that’s what friends do – we talk about the good, not so good, and everything in between. So, let’s discuss some writing tips for visual artists. Shall we?

I know that for many makers, visual artists, and creative people, writing is not always the easiest thing for you to do. You’re a maker, or a visual artist. You’re not creative in that way. I get it. We’re all creative but in different ways. So, when we’re expected to use certain skills – like writing – which is not quite our strongest suit, that can become challenging.

It’s like the way some artists feel about marketing their art. They’re like, “I’m an artist not a salesperson”. The same sentiment is often expressed when artists are confronted with writing. You hear, “I’m an artist, not a writer”.

I understand where that sentiment comes from. I too used to dread writing.
However, it doesn’t stop us artists from being called upon, time and time again to write as part of our art practice. Very often, we’re called upon to write things like an artist bio, an artist statement, or an artist resume. Sometimes we’re asked to contribute articles or art tutorials for certain publications. Yes. Yes. And yes!!! Writing can become a common theme in your art practice.

The two latter types of writing are usually not as scary as the first three. Well, because we love our art, we live it and breath it. So, it’s easier to talk about it and show people how to do it.
On the other hand, the first three types sound kind of official, though. And anything official, you know, can be kind of intimidating as well. So there’s that. Then, if writing is not a muscle you exercise often, that can also make you feel uneasy.

Before we go on, let me explain what the first three documents are so that we’re all on the same page about what they are. An artist bio is simply saying- tell us about yourself. The artist statement says, tell us about your art, and the artist resume is saying list your accomplishments. That’s it. Okay, I know. That’s not it. Well, let’s just say, those are great working definitions to start with.
Understanding what you’re supposed to write is simply the first step. Although it’s an important step, it still doesn’t automatically make the writing get done. So, how do you learn to write as a visual artist? I alluded to it earlier. Writing is a muscle that you exercise.
The more you write, the easier it becomes.
Clara Nartey
So, how do you practice writing? The answer is – by writing.

Writing Tips for Visual Artists
Of course, if you’re in a pinch, you’re working with a deadline to get some writing out of the gate, then go look at some writing samples, get someone to help you, and just get it out of the gate before your deadline. Having used that approach before, I know that it’s not the easiest thing to do. The experience can be stressful and can leave a bad taste in your mouth which perpetuates the negative feelings you’ll have towards writing.
1. Take the long view approach.
The better way to do it, is to take the long view approach. The thing is, as a visual artist, some form of writing will always be a part of your life. So, why don’t you rather commit yourself to learning to do some amount of writing? The way to make the writing process palatable for yourself is this. Be ready before you need to be ready. Practice and then practice again.

2. Writing for Visual Artists: Journaling
My secret to practicing how to write is doing it in a non-pressure way – by writing for yourself. When you start by writing for publications or when you write something that will be read by someone else, it always comes with some amount of pressure. Will they like it? Maybe I should have, or could have done it this way or that way.
I find journaling to be the easiest way to practice writing without pressure. It’s a form of writing that’s not intended for an audience. However, doing it consistently trains you to simply write. Then after a while, you find that you’re learning to express yourself better, and before you know it, although writing may never be your thing, it won’t be such a dreadful thing anymore.
For fiber artists, the most common form of writing we’re called upon to do is to submit artist statements when entering our works in group shows. I find that journaling helps tremendously with artist statements. Artist statements call on you to do the kind of reflection on your art, your inspirations, and influences that aligns so well with journal writing.
3. Writing for Visual Artists: Blogging
If you’re interested in a more public way of practicing to write, then blogging is another great way to build your writing muscle. The more I blogged about my art, the better I understood why I created them. The better I understood why I create, the better I’m able to articulate myself. But it all started with writing for myself first – by journaling.

4. Get Writing Help
Since we’re on the subject of public ways to practice writing, let me add that you can also look into writing workshops. Lots of public libraries have those kind of free resources available to you. So, look into it. Along the same lines, you can also look into paid writing workshops. If you have a favorite author or writer, chances are, they have a writing workshop that you can take to learn how to write better.
5. Join a Challenge
Finally, another suggestion for learning to write is to take part in a writing challenge. If you’re not a self-starter or you’ve tried writing on your own and were not successful, then try a challenge. The good thing about a challenge is that other people are doing it with you. That gives you a certain level of accountability and motivation to keep you going to the end of the challenge.
Question: What has your experience with writing for your art been? Do you dread it? Have you found ways to deal with it?

Hey Creative Friend,
I’m doing another of my public sharing of my annual goals. You can find my 2019 goals here. I like to share my goals with you because it helps me be accountable and it encourages you to set your own goals.

Each time I have shared my goals I get many people telling me how it helped them clarify what they wanted to do and how it inspired them to go for it. So, here’s hoping that my goals this year will get the wheels turning for you as well.
As I’ve explained in previous goal setting posts, you want to convert your goals to SMART goals to make them achievable. Please note that this isn’t the SMART version of my goals. It’s the version of my creative goals that’s easy to post here.
So, let’s get into it.
Art Making
I’m planning to develop my portrait skills further and create an even stronger body of work. I might even take a class if I find the right one. Although at this point, I feel like what I need is more practice, not classes. I’m specifically looking at incorporating more patterns in the background of my works and improving my skills with rendering facial features. I’m also looking at being more playful with my portraits. I want to move beyond the bust to full figure portraits and multi-figure portraits. In addition to all that, I’ve also applied for some amazing opportunities that I’m really excited about.
Online Store
In 2021, I plan to open my art shop so that I can sell prints. I’ve been receiving so many requests that I have to make this happen. I’ve started working on the online store front for my prints but I hit a snag when it came to taxes. I’m not quite sure what I’m supposed to do with taxes. I called my state’s tax office. Didn’t go far with that one. I feel like if I could find someone to spend a few minutes with me I’ll be able to get that part sorted out. So that’s on my agenda for 2021
Educational Programs
I plan to update my existing educational programs because I believe in continuous improvement. I’ll incorporate the feedback I’ve received from my past students to keep improving my courses so that I can better meet the needs of creatives all over the world. I also plan to release two new courses in 2021. As I like to say, teaching is my generosity engine. So, I look forward to using my educational programs to show generosity to some deserving folks.
Exhibitions
This year, I don’t have any plans for a solo show. But who knows. If some great opportunities come up, I won’t turn them down. I’ll keep submitting into group shows that are a good fit for my work. With regards to the regional Connecticut exhibition that I’ve been managing for the last 5 years, I’ll be giving it up this year. I feel it’s time to move on , seek other opportunities and do other things. I believe in supporting the arts. So I’ll find another way to support my art organization. It’s just not going to be as me being the exhibitions manager.
Marketing
Up until now, I haven’t promoted myself as a small business that much. It’s always been a blog. Now, I’ll like to not only set up and promote my art practice as a small business, I’ll also act like a business. My two main marketing tools until now, have been my website and by showing my work in exhibitions. This year, I want to do more. I plan to grow my Instagram following and thereby increase the exposure of my art pieces. I’ll also look into paid advertising and some traditional and non-traditional media sources.
That’s a lot. I’ve got my work cut out for me in 2021. It’s going to be another busy year for sure. Setting stretch goals makes me look forward. It makes me feel like there’s something to wake up to every day.
Although, this is all about creative goals, let me throw in one personal goal I hope to achieve in 2021. Drink no more than 2 cups of tea a day. That’s really going to be hard for me to do, I know. 🙂
Have you set your 2021 goals? Can you share some below? If you haven’t set your goals yet, what’s stopping you? How can I help?
Warmest Regards,
Slater Memorial Museum
Hey Creative Friend,
Last week, I had the opportunity to install an exhibit that I’ve been managing for years on behalf of my art quilting group – Studio Art Quilt Associates, (SAQA) in CT. The exhibit was installed at the Slater Memorial Museum. Due to COVID, most of the exhibits our SAQA Exhibition Committee had planned for the year, could not take place. I’m sure some of you can relate.

This particular show would also have been canceled just like the others. However, I insisted that we made no such advance decisions until there was absolutely no other alternatives. I’m glad I did, and I’m grateful that I had the support of my exhibition team. Now, it turns out that this is going to be the biggest exhibit we’ve put together.
So, let’s take a look at how the installation went and what we can learn from it.
Arriving at the Museum Installation

It had been a beautiful week up until the day of installation when Mother Nature decided to visit a heavy downpour on us. I put on my hat and headed out. I forgot to take an umbrella, though.
We had artworks carefully boxed and loaded up into a car for delivery and each person had their toolkit full of essentials ready for installation. Through the rain we moved the artworks into the museum. Thank God for the prior careful packing by the team members (Kathy Bagioni and Maureen Lopes).

Let’s Get this Show on the Road
The first order of business was to get the artworks out of the boxes and laid out on tables for easy viewing in order to decide what goes where. That is called curating the show. This is exactly what Vivian Zoe, Slater Museum director, enjoys doing. After decades of doing this, she’s really good at it too. So, she was in charge here.

One by one, Vivian picked out pieces and laid them on the floors in front of the walls on which she wanted them to hang. Sometimes, she’ll go back to the main table that had the artworks and swap out some of the pieces. It was like a graceful dance to a beautiful song as you watched the pieces find their partners. If the partners are a good fit, there’s harmony.

Keep in mind that as a curator your number one goal when curating a show is to flatten the differences and heighten the similarities. I learned this rule when I curated my first solo show. If you do this part well, there’s cohesiveness in your show. The pieces seem to work with each other seamlessly as though they were created for each other.
Lesson from Curating a Museum Installation
It’s also the reason when you enter your work into exhibitions, they sometimes get rejected. If your work is bold and different and doesn’t play well with the other pieces in the show it may be rejected not necessarily because of its own merit or lack thereof. Rather, it’s rejected because it’s way different than the rest.
I hope this explanation helps you understand why your work sometimes get rejected for shows. Also, now that you know this, use the knowledge to choose which shows you want to enter your works into because not all shows are the right fit for you.


Artists Do Math 🙂
So, after all the curating was done, it was time to hang the pieces. This next step involved a lot of math. We had to measure each wall, divide it by the number of pieces, determine spacing between pieces, and how high to hang them. Then, mark where nails will go, make sure it’s level, drive the nails into the walls and check the levels and measurements again. There were times when the first attempt didn’t do it. We had to redo a number of them.
At the end of the first day, almost all the large pieces had been hung. I drove back home to rest and return the next day to finish up the work. The second day was devoted to the small works. Between the five of us who worked on the installation, it took us two full days to get most of the pieces hung. I say most because we didn’t quite finish. Slater Memorial Museum is a big place. We had a total of four rooms to fill.

Finalizing the Museum Installation
After the end of Day 1 of installation, I had to call up SAQA CT members to get some more small works so that we could fill up the extra space.
All in all, I’m proud of how the show came together. It’s looking really great. Here are two initial photos I got. I’ll go back later and get better photos.


I don’t have the final opening dates yet. The museum is figuring out how to comply with health regulations with regards to COVID. They’re in the process of hiring staff to do screening of patrons who want to see the exhibit. I can’t wait for it to be opened to the public.
I’ll let you know as soon as I know. In the mean time, you can check on Slater Memorial Museum’s website for updates and keep your eyes opened for my emails if you’re on my mailing list.
Warmest Regards,